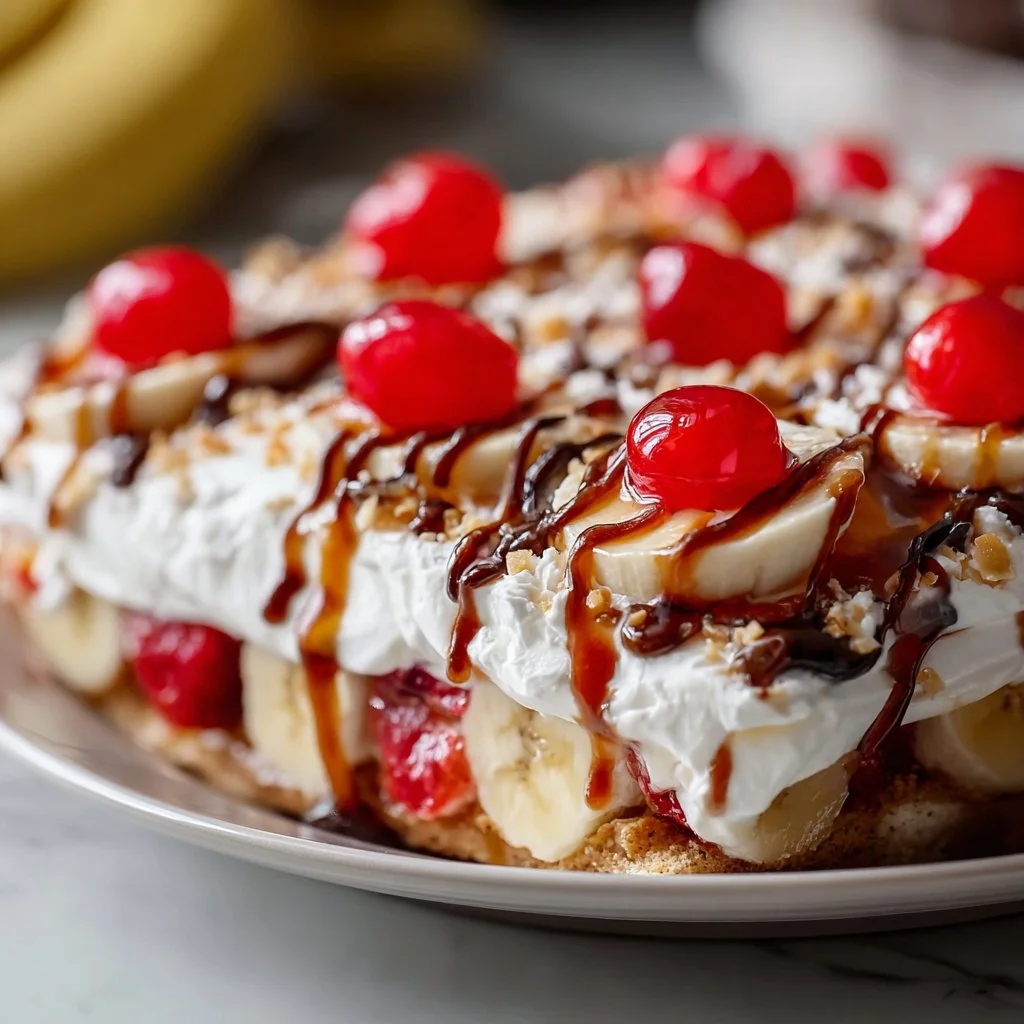
No-Bake Banana Split Cake: A Delicious Trip Down Memory Lane
Hey there, fellow food lovers! Clara here, and today we’re whipping up something that’s not just a delight to the eyes but also a total treat for the taste buds—my No-Bake Banana Split Cake! 🌟 This creation is a joyful nod to one of those classic desserts that reminds you of lazy summer afternoons spent at picnics or family gatherings. If your mouth is watering just thinking about it (we’re talking layers of creamy goodness, sweet fruits, and a chocolate drizzle to top it off!), you’re in for a fantastic culinary adventure!
You see, there’s something magical about banana splits that brings back memories of ice cream parlors where they serve them up in those iconic long dishes, each ingredient lovingly piled high and waiting to be devoured. But let’s be real—sometimes, you just don’t have the time or energy to scoop ice cream, chop fruits, and worry about that perfect masterful drizzling technique. That’s where this No-Bake Banana Split Cake steals the show!
This dessert gives you all the flavors of a traditional banana split while simplifying the process into easy layers that require zero baking time! Seriously, whether you’re a busy bee or a novice in the kitchen looking to impress, this No-Bake Banana Split Cake is your ticket to dessert bliss. So gather your ingredients, roll up those sleeves, and let’s embark on this fun kitchen festivity—because cake is always a good idea! 🍰
Personal Story
I have to tell you about the first time I made this No-Bake Banana Split Cake. It was during one of those charming summer evenings, and my family had gathered for a little backyard barbecue. I was determined to create a dessert that would not only hold a candle to my mom’s famous fruit salad (you know the one with marshmallows and a secret creamy dressing?) but would also be as fun as a childhood ice cream party.
After sifting through recipes, I decided to take a little culinary risk and combine my love for banana splits with my penchant for no-bake desserts. When I almost nervously carried the cake outside, I could feel the excitement building. My siblings’ eyes lit up like kids in a candy store, and I have to say, the moment those first slices hit the plates, the smiles on everyone’s faces were priceless. It was a whirlwind of laughter, delightful chatter, and as everyone took a first bite, the sweet reminiscing began. “Remember the time we almost dropped a banana split on the way to the picnic?”
From that day on, this No-Bake Banana Split Cake became a staple for every family gathering—a symbol of great times and even better flavors. Now, let’s recreate that magic in your kitchen!
Ingredients
Now that you’re ready, let’s gather our ingredients. Here’s what you’ll need to assemble this glorious No-Bake Banana Split Cake:
-
2 cups graham cracker crumbs
The base for our cake, providing a delightful crunch. If you’re gluten-free, swap with gluten-free graham crackers or almond flour mixed with a little sugar. -
1/3 cup unsalted butter, melted
This helps bind our crust together. You can use coconut oil if you’re looking for a dairy-free option. -
1 tsp salt
Just a pinch to enhance all the flavors! -
16 oz cream cheese, softened
Adds richness and a luscious creamy texture. Make sure it’s room temperature for easy mixing! -
1/2 cup granulated sugar
Sweetness time! Feel free to reduce a bit if you’re using super ripe bananas, as they’ll add extra natural sweetness. -
8 oz whipped topping (e.g., Cool Whip)
This gives our filling that light, fluffy consistency. If you want a homemade version, you can whip heavy cream until soft peaks form. -
1 tsp vanilla extract
A must for flavor depth! For a twist, use almond extract. -
3 to 4 bananas, sliced
The quintessential banana element! Choose ripe but firm bananas for the best texture. -
20 oz can crushed pineapple, well-drained
This tropical fruit adds a juicy sweetness. Drain well to keep the layers from becoming soggy. -
20 oz strawberries, sliced
Fresh and vibrant, they add both flavor and color. Substitute with any berry you love—blueberries work wonderfully, too! -
8 oz whipped topping (e.g., Cool Whip)
Another layer of creamy goodness on top! -
1/2 cup chopped hazelnuts (or your favorite nuts)
For a nutty crunch! Pecans or walnuts are delicious alternatives. -
Chocolate sauce (for drizzling)
Because let’s be honest, everything tastes better with a good chocolate drizzle! Use store-bought or homemade—it’s all delicious.
Step-by-Step Instructions
Alright, let’s dive into the fun part—making this beautiful cake!
Step 1: Prepare the Crust
In a large mixing bowl, combine those graham cracker crumbs with melted butter and salt. Mix until everything is well combined—think of it as wet sand ready for molding!
Chef Tip: You can adjust the butter as needed. If your crust isn’t sticking together, try adding a touch more butter to the mixture.
Once it’s all set, press this mixture firmly into the bottom of a 9×13-inch dish. Use a measuring cup or your hands to compact it well. This little foundation will hold all that deliciousness together, so don’t skimp on the effort!
Step 2: Whip Up the Filling
In another mixing bowl, beat the softened cream cheese until smooth. Add the granulated sugar and continue mixing until well incorporated. This is where the magic begins!
Now, fold in your first 8 ounces of whipped topping and vanilla extract until everything is creamy and well combined.
Chef Hack: If you’re using cold cream cheese straight from the fridge, make sure to beat it well. If it’s a bit lumpy, you can microwave it for about 10 seconds—just enough to soften it up a touch!
Step 3: Layer the Deliciousness
Now it’s time to build your cake! Spread half of your cream cheese filling over the prepared crust. Then, layer on half of the sliced bananas, followed by all that luscious crushed pineapple, and half of the sliced strawberries.
Now grab the remaining cream cheese mixture and layer that right over your fruits—get that spatula in there and spread it evenly! Top it off with the remaining banana slices and strawberry slices. Add the last 8 ounces of whipped topping as the crowning glory!
Step 4: The Finishing Touch
Sprinkle those chopped hazelnuts over the whipped topping for a lovely crunch. Finally, grab your chocolate sauce and drizzle it generously over the top.
Chef Insight: You can pop it in the fridge for just a bit to help set everything in place, but the best part is you can serve it right away!
Serving Suggestions
When it comes to serving, cut your No-Bake Banana Split Cake into generous squares. I love to add a sprig of mint on top for a pop of color and freshness! You can even serve it alongside extra sliced fruit—imagine a mini fruit platter next to each serving! For those who adore extra sweetness, a drizzle of additional chocolate sauce never hurts!
Recipe Variations
If you’re feeling adventurous or have specific dietary needs, here are some fun variations to try:
-
Swap the Fruit: Switch up the fruits based on the season or your preferences. Peaches or blueberries can be a delightful change!
-
Nut-Free Option: Omit the nuts for a nut-free dessert, or substitute with seeds like pumpkin or sunflower.
-
Dairy-Free Version: Use coconut cream instead of cream cheese and coconut whipped topping for a tropical spin!
-
Chocolate Lovers Delight: Add layers of chocolate pudding in between the cream cheese and fruit layers for an extra chocolate kick.
-
Add a Crunchy Layer: Consider adding a layer of crushed cookies (like Oreos) for some added flavor and texture!
Chef’s Notes
Whenever I make this No-Bake Banana Split Cake, I can’t help but reminisce about those carefree days at the park. I love how this recipe has evolved—it started off as a casual dessert option and has now become a steadfast part of our family’s gathering traditions. Every time I see my family’s reaction to it, I can’t help but smile.
And let’s be honest, one of the best things about this cake is how forgiving it is. You can truly make it your own, and the joy it brings is simply unmatched. Whatever adjustments you make, I’m certain it will taste like a slice of nostalgia served up on a plate!
FAQs and Troubleshooting
1. My dessert is too runny! What happened?
Make sure your pineapple is well-drained; excess moisture can make the layers watery. You can also let the cake chill for an hour or so before serving to help it set.
2. Can I make this ahead of time?
Absolutely! This cake is perfect for making a day ahead. Just cover it tightly in the fridge to keep it fresh.
3. What if I can’t find certain fruits?
No worries! This recipe is versatile. You can use your favorite frozen fruits or other seasonal fruits if needed.
4. How long will leftovers last?
As if there will be leftovers! But if there are, stored covered in the fridge, it should last 3 to 4 days.
Nutritional Info (optional)
Calorie count may vary based on specific brands and preparation methods.
- Serving Size: 1 slice (1/12 of cake)
- Calories: 250
- Fat: 14g
- Carbohydrates: 30g
- Protein: 3g
- Fiber: 1g
- Sugars: 15g
And there you have it, friends! A delightful No-Bake Banana Split Cake ready to make your taste buds dance. I can’t wait for you to give this a try and make your own beautiful memories around the table with family and friends. Remember, cooking is about sharing joy—so let’s do this together! 🍌🍓🍰
PrintNo-Bake Banana Split Cake
A delightful no-bake dessert that captures the flavors of a classic banana split in a simple layered cake format.
- Prep Time: 20 minutes
- Cook Time: 0 minutes
- Total Time: 20 minutes
- Yield: 12 servings 1x
- Category: Dessert
- Method: No-Bake
- Cuisine: American
- Diet: Vegetarian
Ingredients
- 2 cups graham cracker crumbs
- 1/3 cup unsalted butter, melted
- 1 tsp salt
- 16 oz cream cheese, softened
- 1/2 cup granulated sugar
- 8 oz whipped topping (e.g., Cool Whip)
- 1 tsp vanilla extract
- 3 to 4 bananas, sliced
- 20 oz can crushed pineapple, well-drained
- 20 oz strawberries, sliced
- 8 oz whipped topping (e.g., Cool Whip)
- 1/2 cup chopped hazelnuts (or your favorite nuts)
- Chocolate sauce (for drizzling)
Instructions
- Prepare the crust: In a large mixing bowl, combine graham cracker crumbs with melted butter and salt. Press firmly into the bottom of a 9×13-inch dish.
- Whip up the filling: In another bowl, beat softened cream cheese until smooth, then add sugar, beaten well. Fold in first 8 ounces of whipped topping and vanilla extract.
- Layer the deliciousness: Spread half of the cream cheese filling over the crust, add half of the sliced bananas, all of the crushed pineapple, and half of the sliced strawberries. Spread the remaining cream cheese mixture over the fruits, then top with the remaining banana and strawberry slices, and the last 8 ounces of whipped topping.
- Finish with a sprinkling of chopped hazelnuts and drizzle with chocolate sauce.
Notes
For a nut-free version, omit the nuts; for a dairy-free option, use coconut cream and coconut whipped topping.
Nutrition
- Serving Size: 1 slice
- Calories: 250
- Sugar: 15g
- Sodium: 400mg
- Fat: 14g
- Saturated Fat: 5g
- Unsaturated Fat: 7g
- Trans Fat: 0g
- Carbohydrates: 30g
- Fiber: 1g
- Protein: 3g
- Cholesterol: 30mg
Keywords: banana, dessert, no-bake, cake, summer, family, picnic, easy recipe, sweet