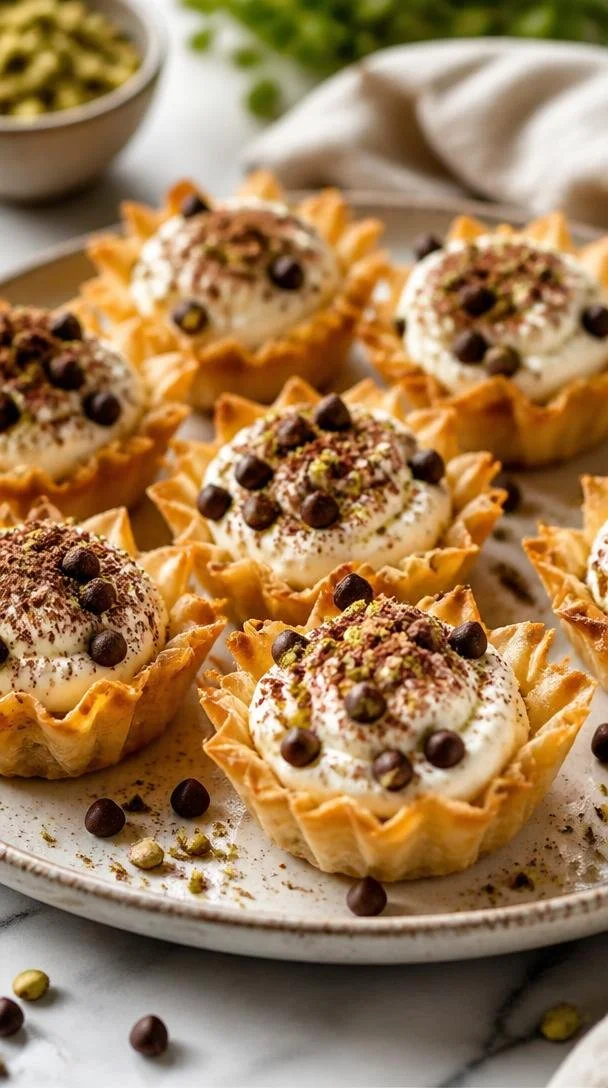
Delightful Mini Cannoli Cups: A Sweet Escape
Hey there, fellow foodies! Clara here, and today I’m excited to share a little slice of sweetness that’s bound to make your taste buds sing. Enter: Mini Cannoli Cups! These bite-sized delights are perfect for any gathering, big or small, and they embody everything I adore about cooking—simplicity, flavor, and that irresistible element of nostalgia that brings us all back to cherished moments.
Let’s face it: sometimes, you just need a sweet treat that feels like a big, warm hug. My love for cannolis goes way back to weekends spent with my Italian grandmother, who had a knack for transforming simple ingredients into show-stopping desserts. Watching her whisk together creamy ricotta and sweet vanilla was magical, and even though the traditional method of making cannolis can be a tad daunting (those pastry shells can be tricky!), I’ve developed a mini version that retains all the delight without all the fuss.
These Mini Cannoli Cups are easy to whip up, and they’re filled to the brim with a luscious ricotta filling made even sweeter with powdered sugar and a sprinkle of chocolate chips. Just pop open a package of mini phyllo pastry cups, and you’ve created a dessert that’s not only delicious but also aesthetically pleasing. Trust me, whether you’re hosting a dinner party or indulging in a personal treat, these mini cannoli cups are sure to steal the show. So, let’s roll up our sleeves and dive into this sweet adventure together!
A Touch of Nostalgia
I can still remember the aroma wafting through my grandmother’s kitchen, a mix of sweet ricotta and that hint of vanilla. It wasn’t just the dessert we were making; it was the moments we shared—laughter, stories, and the occasional playful flour fight. I’d be the little sous-chef beside her, eagerly waiting to fill the shells she had so lovingly crafted.
One festive afternoon, we decided to make cannoli for a family gathering. It was a labor of love, rolling out the dough, cutting perfect circles, and frying them until golden. As I approached the filling stage, my grandma looked at me and said, "Clara, it’s all about the filling. Get creative!” Of course, I interpreted that as “add all the chocolate.” Well, she was right. The filling was divine, but I often think about how much fun we had during that process.
Fast forward to today, I’ve made mini cannoli cups my go-to recipe. They capture that sweet nostalgia with a modern twist that works in my busy life—no frying required! Grab a seat at the kitchen table and let’s create some sweet memories together.
Ingredients
To get started, here’s what you need for these delightful Mini Cannoli Cups:
-
1 package of mini phyllo pastry cups
These ready-made cups provide a perfect crispy vessel for our creamy filling. If you’re feeling adventurous, you could try making your own! -
15 oz ricotta cheese
The star of the show! Ricotta gives the filling its signature creamy texture. For a dairy-free option, try substituting with almond or coconut-based ricotta. -
1 cup powdered sugar
This sweetener blends beautifully into the ricotta, creating a smoother filling. If you prefer, you can use coconut sugar or even agave syrup for a different sweetness. -
1 tsp vanilla extract
A must-have for that lovely aroma and depth of flavor! For a unique spin, consider using almond extract, which pairs beautifully with chocolate. -
1/2 cup mini chocolate chips
Give me chocolate anytime! These little morsels add texture and sweetness in every bite. Substitutions? Try toasting your favorite nuts or swapping in dried fruit for a chewy twist. -
1/2 cup chopped pistachios (optional)
These nutty bites add a gorgeous color and delightful crunch to your cannoli cups. If you’re nut-free, sunflower seeds could work as a lovely alternative. -
Cocoa powder for dusting (optional)
Just a light sprinkle will elevate the visual and flavor profile of your treats. Feel free to experiment with cinnamon or powdered sugar for a different finish!
Step-by-Step Instructions
Now that we have our ingredients ready, let’s dive into the making process! Here’s a step-by-step guide to whip up these Mini Cannoli Cups in no time.
-
Prep Your Ingredients:
Start by making sure all your ingredients are at room temperature. This helps the filling mix more smoothly! While you’re at it, preheat your oven to 350°F (if you’re giving the phyllo cups a little toast for added crispness—trust me, it’s worth it!). -
Make the Filling:
In a mixing bowl, combine the ricotta cheese and powdered sugar. Use a hand mixer or whisk to beat them together until it’s creamy and smooth—this shouldn’t take more than a minute or two. The mixture should be thick yet spreadable. Chef’s Tip: If your ricotta is a bit too watery, give it a squeeze in a clean kitchen towel to remove excess moisture. -
Add Flavor:
Next, stir in the vanilla extract. This step is crucial, as it gives our filling that irresistible flavor! If you’re using chocolate chips, now’s the time to fold them in gently so they’re evenly distributed throughout the mixture. -
Prepare the Phyllo Cups:
If you choose to toast the mini phyllo pastry cups for extra crunch, pop them into the oven for about 5-7 minutes or until they’re golden and fragrant. Keep an eye on them; they can go from golden to burnt quickly! -
Fill the Cups:
Once the phyllo cups are cool and your filling is ready, it’s time to fill them! Using a piping bag or a small spoon, carefully fill each cup with the ricotta mixture. Be generous—don’t be shy! -
Top it Off:
If you’re feeling fancy, sprinkle some chopped pistachios on top of the filling or a light dusting of cocoa powder for that “wow” factor. Presentation is everything, darling! -
Chill and Serve:
For the best taste, let your Mini Cannoli Cups chill in the fridge for at least 30 minutes before serving. This helps the flavors meld beautifully. Enjoy the anticipation—it’s part of the fun!
Serving Suggestions
To serve these Mini Cannoli Cups, arrange them on a beautiful platter. You can garnish the plate with a drizzle of chocolate syrup or a dusting of cocoa powder for a professional touch. These cups are perfect as a dessert after a hearty dinner or as a sweet treat at a brunch get-together. Trust me, they won’t last long!
Recipe Variations
Looking to put your own spin on these Mini Cannoli Cups? Here are a few creative variations:
- Berry Bliss: Fold in some fresh berries like raspberries or strawberries into the ricotta filling for a fruity twist.
- Citrus Burst: Add a teaspoon of lemon or orange zest to the filling for a refreshing flavor enhancement.
- Nut Lover’s Delight: Use a combination of chopped nuts instead of chocolate chips for a more rustic approach.
- Spiced Delight: Incorporate a pinch of cinnamon or nutmeg to the filling for a slightly spiced flavor.
- Vegan Option: Use dairy-free ricotta and sweeteners like maple syrup or agave for a plant-based version of these treats.
Chef’s Notes
Reflecting on this recipe just warms my heart! When I first created these Mini Cannoli Cups, my goal was to simplify the classic cannoli experience while preserving the true essence of the flavors I loved. These little beauties have evolved into a staple in my dessert repertoire, and I often make them for parties or just when I need a little sweet comfort.
And let’s not forget the time I truly got creative and filled these with a lemon ricotta mixture. The refreshing zest paired so well with the flaky pastry! Who knew these cups could be so versatile?
FAQs and Troubleshooting
1. What if my filling is too runny?
If your filling turns out runny, try placing it in the fridge for 30 minutes to allow it to firm up. You can also add more powdered sugar to thicken it, but do so gradually.
2. How long will these cannoli cups last?
They’re best enjoyed fresh, but if you have leftovers, they can be stored in an airtight container in the fridge for up to 2 days. Just keep in mind that the phyllo cups may lose their crispness.
3. Can I freeze the filling?
Yes! The ricotta filling can be frozen for about 2-3 months. Just remember to store it in an airtight container. When ready to use, thaw it in the fridge and give it a good mix before filling the cups.
4. What other containers can I use if I don’t have phyllo cups?
If you can’t find mini phyllo cups, try using mini tart shells or even chocolate cups for a more indulgent dessert! The idea is to create a deliciously fun vessel for that creamy filling.
Nutritional Info
While I know indulgence is key in desserts, I also love to keep an eye on balance. These Mini Cannoli Cups can provide a delightful treat without going overboard! Each cup contains approximately:
- Calories: 100-120
- Fat: 5g
- Carbs: 10g
- Protein: 3g
So there you have it—your path to creating delightful Mini Cannoli Cups that are sure to impress! Remember, it’s not just about the eating; it’s about the moments we create in the kitchen. Grab your apron, embrace the delicious mess, and let’s make some unforgettable memories. Happy cooking!
PrintMini Cannoli Cups

Delightful bite-sized cannoli cups filled with a creamy ricotta mixture and mini chocolate chips.
- Prep Time: 15
- Cook Time: 7
- Total Time: 45
- Yield: 12 servings 1x
- Category: Dessert
- Method: Chilling
- Cuisine: Italian
- Diet: Vegetarian
Ingredients
- 1 package of mini phyllo pastry cups
- 15 oz ricotta cheese
- 1 cup powdered sugar
- 1 tsp vanilla extract
- 1/2 cup mini chocolate chips
- 1/2 cup chopped pistachios (optional)
- Cocoa powder for dusting (optional)
Instructions
- Prep your ingredients: Make sure all your ingredients are at room temperature. Preheat your oven to 350°F if toasting the phyllo cups.
- Make the filling: In a mixing bowl, combine the ricotta cheese and powdered sugar. Use a hand mixer to beat until creamy and smooth.
- Add flavor: Stir in the vanilla extract and fold in the chocolate chips gently.
- Prepare the phyllo cups: If toasting, pop them into the oven for about 5-7 minutes until golden and fragrant.
- Fill the cups: Once the cups are cool, fill them generously with the ricotta mixture.
- Top it off: Sprinkle chopped pistachios or cocoa powder as desired.
- Chill and serve: Let the cups chill in the fridge for at least 30 minutes before serving.
Notes
These cups are best enjoyed fresh, but can be stored in an airtight container for up to 2 days.
Nutrition
- Serving Size: 1 cup
- Calories: 120
- Sugar: 10g
- Sodium: 100mg
- Fat: 5g
- Saturated Fat: 3g
- Unsaturated Fat: 2g
- Trans Fat: 0g
- Carbohydrates: 10g
- Fiber: 0g
- Protein: 3g
- Cholesterol: 20mg
Keywords: cannoli, dessert, Italian, sweet treats, ricotta, mini desserts