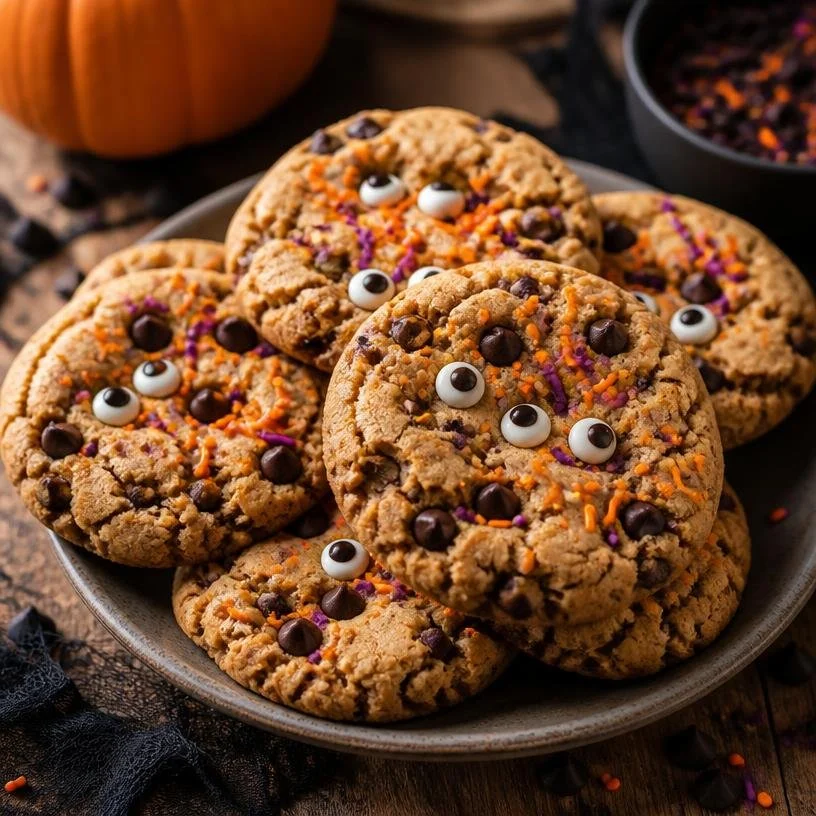
The Spooktacular Joy of Halloween Chocolate Chip Cookies
Ah, Halloween—the time of year when the air gets crisp, leaves turn into beautiful shades of amber and crimson, and the excitement of trick-or-treaters fills the streets. It’s a time of creativity, where you can let your imagination run wild with costumes, decorations, and, yes, even treats! While I love a good pumpkin spice anything (don’t get me started, I could talk for hours!), there’s something undeniably nostalgic about chocolate chip cookies, especially when they’re dressed up for Halloween.
Let’s face it: chocolate chip cookies are already amazing, but with a splash of Halloween spirit, they turn into the ultimate festive indulgence! My Halloween Chocolate Chip Cookies are not only a delightful treat for your sweet tooth, but they also make the perfect canvas for some fun and creativity. Whether you’re hosting a spooky soiree, baking with the kids, or simply indulging in some self-care while decorating cookies, these goodies are a hit every time!
Imagine walking into your kitchen as the smell of freshly baked cookies wafts through the air, instantly bringing a smile to your face. That moment—watching them bake to golden perfection, adding a pop of festive color with sprinkles, and decorating them with candy eyes—is the essence of what cooking (and baking) is all about. So grab your apron and let’s dive into this delicious fall tradition, one spooky cookie at a time!
My Halloween Baking Adventure
I still remember the first time I attempted to bake Halloween cookies. I was around ten years old, armed with a simple chocolate chip cookie recipe from my mom’s old cookbook—a dog-eared classic with some flour stains, as you can imagine! I was determined to add a Halloween twist without having a clue what that meant. So I went to work, tossing in some orange and black sprinkles, mumbling to myself about how “spooky” they’d be.
After a close call with a rogue batch (thankfully they didn’t go to waste), I finally pulled a tray of cookies from the oven. They were slightly overbaked but had the most incredible aroma filling the kitchen. I remember my little sister excitedly watching, her eyes lighting up at the sight of our creations. We spent the evening decorating them with anything we could find—chocolate chips, random candies left over from last year, and, of course, a dash of love (which is the secret ingredient, if you ask me!).
Those cookies may not have been professional level, but they were made with so much joy—one of many baking memories that shaped my journey in the kitchen. Fast forward to now, and I’m thrilled to share my elevated take on those beloved treats with you! So, let’s get those ovens preheating!
Ingredients
Here’s what you’ll need for these delightful Halloween Chocolate Chip Cookies:
-
1 cup unsalted butter, softened
Brings richness to the cookies. Make sure it’s at room temperature for easy mixing. If you’re in a pinch, you can use margarine. -
3/4 cup granulated sugar
Adds sweetness and helps create that lovely crunchy exterior while keeping the inside chewy. For a lower-calorie alternative, consider using coconut sugar. -
3/4 cup brown sugar, packed
Provides moisture and a rich, caramel-like flavor. Light or dark brown sugar works here; just remember, dark will give you a deeper flavor. -
1 teaspoon vanilla extract
Enhances the buttery flavor and adds depth. Go for pure vanilla if you can—it’s worth it! -
2 large eggs
Bind the ingredients together and contribute to the chewy texture. Room temperature eggs mix better, so take them out of the fridge beforehand. -
2 1/4 cups all-purpose flour
Gives structure to the cookies. Make sure to spoon it into the measuring cup to avoid overpacking. -
1 teaspoon baking soda
Helps the cookies rise and gives them a nice texture. Ensure your baking soda is fresh for the best results. -
1/2 teaspoon salt
Balances the sweetness and enhances the flavors. Don’t skip this! Salt is your friend. -
2 cups chocolate chips
Because more chocolate is always better! You can mix and match with semi-sweet, milk, dark, or even white chocolate chips for a fun twist. -
1 cup Halloween sprinkles
For that festive flair! These make your cookies pop with color and fun. -
Candy eyes for decoration
These are the final touch that’ll make your cookies a spooky sight! You can find them in most grocery stores or craft shops around Halloween.
Step-by-Step Instructions
Now that you’ve got all your ingredients lined up, let’s get to the fun part—baking these beauties!
-
Preheat the Oven and Prep the Baking Sheet
Preheat your oven to 350°F (175°C). Line your baking sheets with parchment paper. This helps the cookies bake evenly and makes for easy cleanup! -
Cream the Butter and Sugars
In a large mixing bowl, beat together the softened butter, granulated sugar, and brown sugar until the mixture is light and fluffy—about 2–3 minutes. This is where all the magic begins! The air you incorporate will help your cookies rise beautifully. -
Add Eggs and Vanilla
Next, mix in the eggs one at a time, followed by the vanilla extract. Beat well after each addition. This step ensures your cookies will be rich and tasty! -
Combine Dry Ingredients
In a separate bowl, whisk together the all-purpose flour, baking soda, and salt. Gradually add this mixture to your wet ingredients, making sure to mix until just combined. Don’t over-mix it; you want your cookies to be soft and tender! -
Fold in Chocolate Chips and Sprinkles
Gently fold in the chocolate chips and Halloween sprinkles into the cookie dough. You can also save some sprinkles to sprinkle on top before baking for that extra crunch! -
Scoop the Cookie Dough
Using a cookie scoop or tablespoon, drop spoonfuls of cookie dough onto the prepared baking sheets, leaving plenty of space between each one for spreading. -
Add Candy Eyes
Plop a candy eye or two on each cookie. This will give your cookies that adorable spooky look when they’re baked! -
Bake
Bake in the preheated oven for about 10–12 minutes, or until the edges are golden brown and the centers are set but still soft. Your kitchen will smell heavenly during this stage! -
Cool and Enjoy!
Allow the cookies to cool on the baking sheet for a few minutes before transferring them to a wire rack to cool completely. This will ensure they hold their shape. Enjoy them warm, with a glass of cold milk or a cup of coffee!
Serving Suggestions
Once baked and cooled, these Halloween Chocolate Chip Cookies are ready to be devoured! Serve them on a platter decorated with festive napkins and perhaps some dark, eerie-themed plates for a frightfully delightful presentation. Stack them high for an eye-catching dessert display, and don’t forget to leave some out for your trick-or-treating guests!
Recipe Variations
Looking to mix things up a bit? Here are some creative twists for your Halloween Chocolate Chip Cookies:
-
Pumpkin Spice Twist: Add 1/2 cup of canned pumpkin puree to the wet ingredients and sprinkle in 1 teaspoon of pumpkin pie spice for a seasonal flavor explosion.
-
Nutty Surprise: Fold in 1/2 cup of chopped walnuts or pecans for some added crunch and nutty goodness!
-
Ghostly White Chocolate: Swap out regular chocolate chips for white chocolate chips, which pairs beautifully with Halloween sprinkles!
-
Chocolate-Dipped Delight: Drizzle melted chocolate over the cooled cookies for an extra indulgent treat.
-
Gluten-Free Version: Use a 1:1 gluten-free flour substitute instead of all-purpose flour to create a gluten-free cookie without compromising the flavor!
Chef’s Notes
Over the years, I’ve played around with this recipe, trying out various nuts, chips, and spices. One particularly memorable time, I decided to make a batch using leftover candy corn. I couldn’t believe how fun they turned out! The colors mixed in with the dough, creating a vibrant, cheerful cookie that was perfect for the party. My friends couldn’t stop talking about them!
Remember, the key to a successful cookie is balance. If you find your dough too dry, a splash of milk can work wonders! And if it’s too wet, a little extra flour will help. Whatever you do, don’t forget to enjoy the process!
FAQs and Troubleshooting
1. Why are my cookies flat?
If your cookies spread too much during baking, it’s likely due to the butter being too warm or melted instead of softened. Make sure to always use softened butter, and consider chilling the cookie dough for about 30 minutes before baking.
2. Can I freeze the cookie dough?
Absolutely! You can scoop out portions of the dough onto a baking sheet, freeze them, and then store them in an airtight container or freezer bag for up to 3 months. When you’re ready, just pop them in the oven straight from the freezer, adding a couple of extra minutes to the baking time.
3. How do I store leftover cookies?
Keep them in an airtight container at room temperature for up to a week. For longer lasting freshness, you can freeze baked cookies as well! Just ensure they are fully cooled before sealing them away.
4. Can I use a different type of chocolate chip?
For sure! Experiment with milk chocolate, dark chocolate, or even flavored chips like butterscotch or peanut butter for a twist. Each type will lend a different flavor to your cookies.
Nutritional Info
While I believe in moderation, here’s a rough estimate of the nutritional information per cookie (based on about 24 cookies):
- Calories: 180
- Total Fat: 8g
- Saturated Fat: 5g
- Cholesterol: 25mg
- Sodium: 90mg
- Total Carbohydrates: 27g
- Dietary Fiber: 1g
- Sugars: 14g
- Protein: 2g
So there you have it! My spooktacular Halloween Chocolate Chip Cookies that promise to bring joy and a hint of nostalgia with every bite. I hope they add a dash of sweetness to your Halloween celebrations and inspire some delightful baking memories of your own! Happy baking, and remember—there’s no such thing as too many cookies!
PrintHalloween Chocolate Chip Cookies
Delicious and festive Halloween chocolate chip cookies adorned with sprinkles and candy eyes, perfect for celebrating the spooky season!
- Prep Time: 15 minutes
- Cook Time: 12 minutes
- Total Time: 27 minutes
- Yield: 24 cookies 1x
- Category: Dessert
- Method: Baking
- Cuisine: American
- Diet: Vegetarian
Ingredients
- 1 cup unsalted butter, softened
- 3/4 cup granulated sugar
- 3/4 cup brown sugar, packed
- 1 teaspoon vanilla extract
- 2 large eggs
- 2 1/4 cups all-purpose flour
- 1 teaspoon baking soda
- 1/2 teaspoon salt
- 2 cups chocolate chips
- 1 cup Halloween sprinkles
- Candy eyes for decoration
Instructions
- Preheat your oven to 350°F (175°C) and line your baking sheets with parchment paper.
- Cream the softened butter, granulated sugar, and brown sugar until light and fluffy, about 2–3 minutes.
- Add the eggs one at a time, followed by the vanilla extract, mixing well after each addition.
- Combine the flour, baking soda, and salt in a separate bowl, then gradually mix this into the wet ingredients until just combined.
- Fold in the chocolate chips and Halloween sprinkles.
- Scoop spoonfuls of cookie dough onto the prepared baking sheets, leaving space between each.
- Add a candy eye or two on each cookie before baking.
- Bake for 10–12 minutes, until golden brown around the edges but soft in the center.
- Cool on the baking sheet briefly before transferring to a wire rack.
Notes
For extra festive flair, save some sprinkles to add on top before baking. Enjoy these cookies with a glass of milk or a warm beverage!
Nutrition
- Serving Size: 1 cookie
- Calories: 180
- Sugar: 14g
- Sodium: 90mg
- Fat: 8g
- Saturated Fat: 5g
- Unsaturated Fat: 2g
- Trans Fat: 0g
- Carbohydrates: 27g
- Fiber: 1g
- Protein: 2g
- Cholesterol: 25mg
Keywords: Halloween, chocolate chip cookies, festive treats, baking, autumn desserts