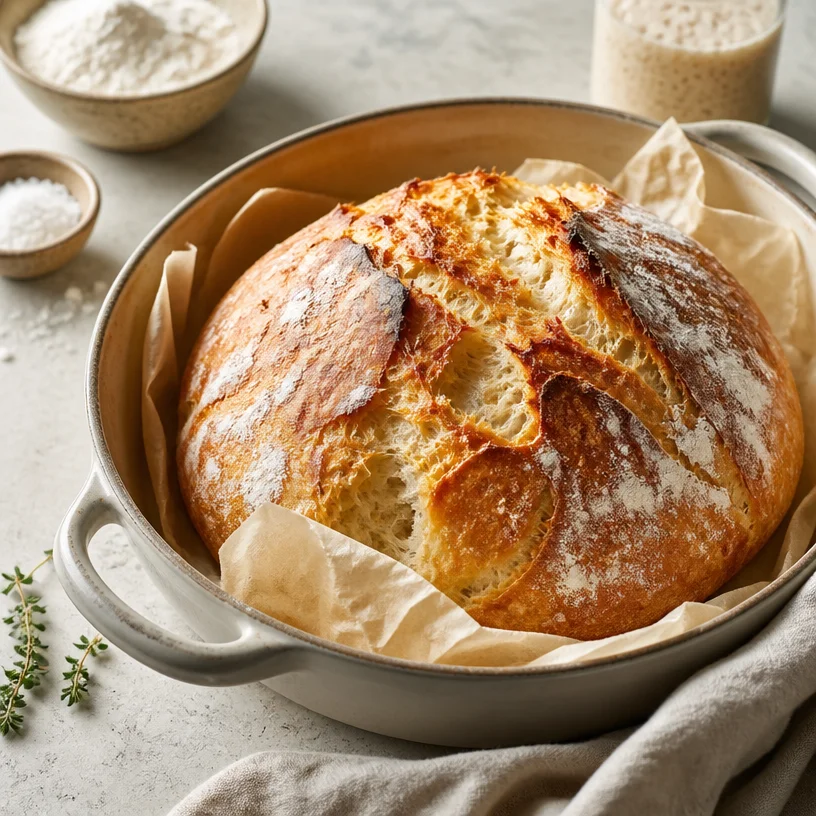
The Magic of No-Knead Bread: Your New Favorite Comfort Bake
Ah, bread! Is there anything more comforting than the smell of freshly baked bread wafting through your kitchen? That warm, toasty aroma invites you to slow down and savor life a little bit more. Today, I want to share with you one of my absolute favorite recipes—No Knead Bread. This is not just any loaf; it’s the kind of bread that transforms simple ingredients into a crusty, chewy masterpiece without the elbow grease of kneading. Whether you’re a seasoned baker or a kitchen newbie, this bread will surely elevate your culinary game and fill your home with love.
The beauty of this recipe lies in its simplicity. With just four ingredients—flour, yeast, water, and salt—you can create the kind of artisanal bread that would make any bakery proud. Plus, the best part? You don’t have to knead it! That’s right; no need for fancy kitchen gadgets or that workout routine of kneading dough for what feels like an eternity. Your hands are free to tackle the more fun aspects of cooking—like tasting and testing!
But what makes this no-knead bread extra special is its story. It’s more than just a recipe; it’s a way to connect with the food and people in our lives. I remember the first time I made this bread. My kitchen filled with an aroma that transported me back to my grandmother’s rustic kitchen, where she would bake loaves of bread for our Sunday family dinners. Those moments gathered around the table, sharing stories and laughter, made me realize that food has the power to bring us together. So grab your apron, and let’s embrace the magic of no-knead bread!
A Slice of Nostalgia
Growing up, Sunday dinners were a cherished tradition in my family, one that revolved around my grandmother’s kitchen. You could always count on the fact that there would be a fresh loaf of bread resting on the table. I can still hear the comforting sounds—the crackle of the crust as we broke into it, the laughter of my family, and the delightful conversations that flowed as freely as the wine from my grandfather’s hearty pour.
One Sunday, I decided to take a shot at replicating that nostalgic bread-making experience. I dug out her old recipe collection, dusted off the flour, and reached for my favorite mixing bowl. But as I read through the ingredients, I realized I didn’t have the strength that my grandmother had in her younger years to knead dough tirelessly. That’s when I stumbled upon the no-knead bread method. It was a revelation! With a little bit of patience and a lot of love, I could create a loaf that honored my grandmother’s legacy, all while keeping my hands relatively clean. Every time I bake this bread, I’m not just making a loaf; I’m making memories, filling my home with love, and keeping my grandmother’s spirit alive.
Ingredients
To create this delightful no-knead bread, you will need the following four ingredients:
-
All-Purpose Flour: This staple ingredient is what gives the bread its structure. You can also use bread flour for a chewier texture. If you’re gluten-free, consider using a gluten-free flour blend, but the texture may vary.
-
Active Dry Yeast: This little powerhouse is responsible for the dough’s rise. If you prefer, you can also use instant yeast, which does not require activation. Just mix it directly with the flour.
-
Water: Essential for hydrating your flour and activating the yeast. Use room temperature water for optimal results. If you want to add a touch of flavor, you can opt for warm water or even replace a portion of the water with beer for a rich flavor twist.
-
Salt: Enhances the flavor of the bread and controls yeast activity. Never skip the salt, as it’s crucial for taste and texture. Feel free to experiment with flavored salts, like garlic or herb-infused varieties, for an extra layer of taste.
Step-by-Step Instructions
Now that we have our ingredients ready, let’s dive into the making of this wonderful no-knead bread!
Step 1: Combine the Dry Ingredients
In a large mixing bowl, whisk together 3 cups of all-purpose flour, 1 teaspoon of salt, and 1/4 teaspoon of active dry yeast until well blended. This simple step combines the flavors and ensures an even rise in your bread. Mix with love, as they say!
Step 2: Add Water
Pour in 1 1/2 cups of room temperature water into the dry mixture. Using a spatula or wooden spoon, stir until you form a shaggy dough—don’t worry about being perfect! It should look messy, and that’s completely normal. Just make sure all the flour is incorporated and there are no dry patches.
Step 3: Let it Rise
Cover the bowl with plastic wrap or a clean kitchen towel and place it in a warm, draft-free area. Let it rise for about 12 to 18 hours—yes, you heard me right! This slow fermentation process is where the magic happens. It allows the flavors to develop fully, resulting in a beautifully crusty loaf. You can even let it rise overnight before baking in the morning for a perfect brunch treat.
Step 4: Preheat Oven and Prepare for Baking
About 30 minutes before you’re ready to bake, preheat your oven to 450°F (232°C) and place a Dutch oven (with the lid) inside to warm up. The heavy pot acts like a steam oven, creating a crispy crust.
Step 5: Shape the Dough
Once the dough has risen and doubled in size, turn it out onto a well-floured surface. With floured hands, gently shape the dough into a ball by folding the edges into the center. This step doesn’t require much work—be gentle to preserve those glorious air bubbles. You’ll want to coat it lightly in flour to prevent sticking, then cover it with a towel for another 30 minutes.
Step 6: Bake the Bread
Now comes the exciting part! Carefully remove the hot Dutch oven from the oven (watch those fingers!). Lift the lid, and gently place your dough ball inside. Cover it with the lid and pop it back into the oven. Bake for 30 minutes with the lid on, then remove the lid and bake for an additional 15 to 20 minutes, until the bread is golden brown and crusty.
Step 7: Cool and Enjoy
Once your loaf is baked to perfection, carefully transfer it to a wire rack to cool. I know it can be tempting to slice right into it, but let it cool for at least 30 minutes before cutting. This final step allows the crumb to set perfectly, ensuring that every slice is just as delightful as the first.
Serving Suggestions
When it comes to serving your no-knead bread, the possibilities are endless! Slice it thick and slather it with butter and your favorite jam for a delightful breakfast. Serve it alongside a hearty soup or salad, or simply use it to create the ultimate sandwich. Tip: For an elevated experience, try toasting slices in a pan with a little olive oil for a crispy texture!
Recipe Variations
Feeling adventurous? Here are a few creative twists to try:
-
Herbed No-Knead Bread: Add fresh herbs such as rosemary, thyme, or basil to the flour mixture for a fragrant loaf.
-
Cheesy Delight: Fold in shredded cheese like cheddar or mozzarella into the dough before it rises for a gooey surprise!
-
Add-Ins Galore: Experiment with adding nuts, seeds, olives, or sun-dried tomatoes for extra flavor and texture.
-
Sweet Twist: Transform it into a sweet loaf by adding sugar, cinnamon, and dried fruits like cranberries or raisins.
Chef’s Notes
I can’t tell you how many times this recipe has saved the day. I’ve used it for everything from last-minute dinners with friends to cozy holiday gatherings. And let me tell you, every single time, it garners rave reviews! One memorable evening, I made a batch and brought it to a potluck. Let’s just say I returned home with an empty bread basket and a ton of new friends! This recipe truly represents the fusion of tradition and practicality.
FAQs and Troubleshooting
1. My bread didn’t rise! What went wrong?
There are a few possibilities. Firstly, check the freshness of your yeast; expired yeast can lead to a flat loaf. Ensure the water temperature was right—too hot can kill the yeast, while too cold can slow it down. Also, make sure the dough was kept in a warm, draft-free spot to encourage rising.
2. Why is my crust too hard?
If your crust is overly hard, it might be because the bread was overbaked. Keep an eye on it during the last few minutes of baking. You can also try baking it at a slightly lower temperature.
3. Can I store the bread?
Absolutely! Store it in a paper bag at room temperature for a day or two. If you want it to last longer, slice the bread and freeze it in a sealed bag. Just pop the slices in the toaster whenever you crave a warm piece of bread!
4. The dough is too sticky; what can I do?
Dough can vary depending on humidity and the type of flour. If your dough feels overly sticky, sprinkle in a bit more flour until it’s manageable. Remember, the trick is to keep it moist but not too wet.
Nutritional Info
While homemade bread is often healthier than store-bought options, here’s a rough breakdown for one serving (1 slice if you get 12 slices from the loaf):
- Calories: 80
- Total Fat: 0.5g
- Sodium: 120mg
- Total Carbohydrates: 15g
- Protein: 2.5g
Remember, these numbers can vary based on your specific ingredients and portion sizes.
In conclusion, making no-knead bread is not just about the food; it’s about the moments that are created in the kitchen. So go ahead, make a scrumptious loaf, and gather your loved ones around the table. What are you waiting for? Your baking adventure awaits, and I can’t wait to hear your stories and see your creations! Happy baking!
PrintNo-Knead Bread
A simple and delicious no-knead bread that transforms four basic ingredients into a crusty, chewy masterpiece.
- Prep Time: 15 minutes
- Cook Time: 45 minutes
- Total Time: 60 minutes
- Yield: 12 servings 1x
- Category: Bread
- Method: Baking
- Cuisine: American
- Diet: Vegetarian
Ingredients
- 3 cups all-purpose flour
- 1 teaspoon salt
- 1/4 teaspoon active dry yeast
- 1 1/2 cups room temperature water
Instructions
- Combine the dry ingredients in a large mixing bowl, whisking together flour, salt, and yeast until blended.
- Add water to the dry mixture and stir until you form a shaggy dough.
- Cover the bowl with plastic wrap and let it rise in a warm area for about 12 to 18 hours.
- Preheat the oven to 450°F (232°C) with a Dutch oven inside.
- Shape the risen dough into a ball and coat it lightly in flour.
- Transfer the dough into the hot Dutch oven, cover it with the lid, and bake for 30 minutes.
- Remove the lid and bake for an additional 15 to 20 minutes until golden brown.
- Cool the bread on a wire rack for at least 30 minutes before slicing.
Notes
Enhance flavor by experimenting with herbs, cheese, or sweet ingredients.
Nutrition
- Serving Size: 1 slice
- Calories: 80
- Sugar: 0g
- Sodium: 120mg
- Fat: 0.5g
- Saturated Fat: 0g
- Unsaturated Fat: 0g
- Trans Fat: 0g
- Carbohydrates: 15g
- Fiber: 1g
- Protein: 2.5g
- Cholesterol: 0mg
Keywords: bread, no-knead bread, easy bread recipe, homemade bread