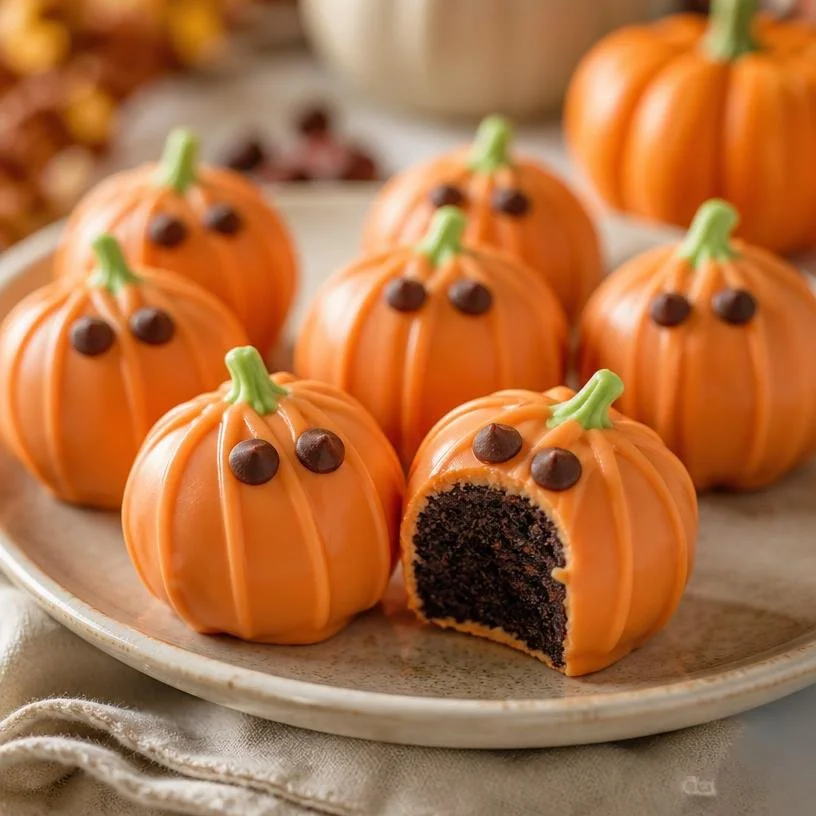
No-Bake Pumpkin Shaped Oreo Balls: A Sweet Treat for Fall
As the leaves start to change and we cozy up for the autumn season, it’s time to embrace all things pumpkin! When the air gets crisp and the days get shorter, I can’t help but think of the delightful flavors and simple joys that fall brings. One of my favorite fall treats to whip up in the kitchen is none other than No-Bake Pumpkin Shaped Oreo Balls. These little beauties are not just a feast for your taste buds; they’re a playful nod to the season that’s perfect for sharing. Plus, who doesn’t love the idea of transforming ordinary Oreo cookies into adorable pumpkin bites?
I still remember the first time I made these with my niece Emma. It was a rainy afternoon, and we were looking for a fun activity that didn’t require turning on the oven. With just a few ingredients and minimal cleanup, we rolled up our sleeves, pulled out the Oreos, and let our creativity flow. As we mixed and shaped the dough, we shared stories of past autumn memories, laughed at how messy our fingers got, and ended up with a batch of treats that brought smiles to everyone’s faces. The best part? These pumpkin-shaped Oreo balls tasted just as good as they looked, proving that even the simplest recipes can create the most delightful moments!
So, gather your ingredients, put on your favorite playlist, and let’s dive into this easy and unforgettable no-bake recipe that will surely become a staple in your fall festivities!
Ingredients
Here’s what you’ll need to create your own pumpkin-shaped Oreo balls:
-
1 package of Oreo cookies
- Chef Insight: The classic dark chocolate Oreos give these treats a rich flavor, but if you’re feeling adventurous, try using golden Oreos for a lighter twist!
-
8 oz cream cheese, softened
- Substitution Tips: If you’re looking for a lighter option, you can use low-fat cream cheese or even a plant-based cream cheese for a dairy-free version.
-
Orange candy melts
- Hot Tip: These candy melts will transform your Oreo balls into the perfect pumpkin color! If you can’t find orange, mix red and yellow melts for a vibrant hue.
-
Mini chocolate chips (for eyes)
- Little Chef Hack: You can also use candy eyes for a fun twist, or if you want to get really creative, pipe melted white chocolate dots for the eyes!
-
Green candy melts (for stems)
- Substitution Tips: If you’re in a pinch, a small piece of green fondant or even a green gummy candy can work as an adorable stem.
Step-by-Step Instructions
Ready to get rolling? Let’s make those pumpkin Oreo balls!
-
Crush the Oreos: Place the entire package of Oreo cookies in a food processor and pulse until they are a fine crumb. If you don’t have a food processor, you can place the Oreos in a resealable plastic bag and crush them with a rolling pin. It’s a fun way to get out some energy!
-
Mix in the Cream Cheese: In a large bowl, combine the Oreo crumbs with 8 oz of softened cream cheese. Use your hands or a spatula to mix everything together until it’s fully combined and forms a gooey dough. It should be moist but manageable. This is where the magic happens as the cream cheese brings everything together!
-
Form the Balls: Now comes the fun part! Grab about a tablespoon of the mixture and roll it into a ball. Place them on a baking sheet lined with parchment paper. You can make them as big or as small as you like, but I find that about 1-inch balls are just right and easy to eat!
-
Chill the Dough: Pop the baking sheet into the refrigerator for about 30 minutes or until the balls firm up. This step is crucial to ensure they hold their shape when coated with candy melts.
-
Melt the Candy Coating: While those little delights are chilling, it’s time to melt the orange candy melts. Follow the instructions on the package, but typically, you’ll want to microwave them in 30-second intervals, stirring in between until smooth and fully melted.
-
Coat the Oreo Balls: Once the Oreo balls are nice and cold, dip each one into the orange candy coating. Allow any excess coating to drip off and place them back on the parchment paper.
-
Add the Mini Chocolate Chips: Before the candy coating sets, gently press two mini chocolate chips onto each ball to create adorable little eyes.
-
Make the Stems: Melt the green candy melts and use a toothpick or a spoon to create a small stem on top of each pumpkin ball. The fun part about this is that it doesn’t have to be perfect—each pumpkin can have its own unique shape!
-
Final Chill: Place the pumpkin Oreo balls back in the refrigerator for about 15 minutes to set the candy coating completely.
-
Serve and Enjoy!: Once they’re set, plate them up in a fun fall-themed dish, and watch as everyone dives in!
Serving Suggestions
To make your pumpkin Oreo balls look as good as they taste, consider plating them on a rustic wooden board or in a colorful fall-themed bowl. You can even sprinkle some edible glitter or colorful sprinkles around for an additional touch of festivity. For that extra dose of autumn charm, serve them alongside a warm spiced cider or hot chocolate!
Recipe Variations
Feeling adventurous? Here are a few fun twists you can try with this recipe:
- Spiced Pumpkin Flavor: Add 1 teaspoon of pumpkin pie spice to the cream cheese mixture for a warm fall flavor that pairs perfectly with the Oreos.
- Nutty Pumpkin Crunch: Mix in some chopped pecans or walnuts into the Oreo and cream cheese mixture for a delightful crunch.
- Chocolate Drizzle: Add a cheeky drizzle of melted dark chocolate over the orange coating for a sweet surprise!
- Supersize Them: Instead of making bite-sized balls, create oversized pumpkin treats for a fun and shareable dessert centerpiece.
- Decorate for Halloween: Use black icing to draw spooky faces on your pumpkins, making them perfect for Halloween parties!
Chef’s Notes
This recipe has been a go-to for me for years! I love how versatile the Oreo ball concept is—every time I make them, I tweak it a little, whether by adding different flavorings or using various colored melts for different occasions. One particularly funny kitchen memory I have is when my husband decided to “help” by stirring the candy melts while I prepped the balls. Let’s just say chocolate ended up everywhere, but the laughter we shared made it all worth it! Cooking is such a joyous experience, full of mini adventures, and that’s what I adore most about it.
FAQs and Troubleshooting
-
Can I make these ahead of time?
- Absolutely! These pumpkin Oreo balls can be made a few days in advance and stored in an airtight container in the fridge. Just be sure to let them sit at room temperature for a few minutes before serving!
-
Why is my candy coating not smooth?
- If your candy melts are too thick, they might need a little thinning. Try adding a teaspoon of vegetable oil or shortening to the melted candy to get that smooth consistency.
-
How do I store leftover Oreo balls?
- Keep them in an airtight container in the refrigerator, where they should stay fresh for up to a week. Just be advised that the candy coating can become a little sticky over time.
-
Can I freeze these pumpkin Oreo balls?
- Yes, you can freeze them! Just place them in a single layer in a freezer-safe container for up to a month. Thaw them in the fridge before serving, and they’ll taste just as delicious!
Nutritional Info
While this recipe is all about indulgence and fun, here’s a quick breakdown of what you can expect per ball (varies based on size):
- Calories: 120
- Fat: 7g
- Sugar: 9g
- Protein: 1g
Enjoy every moment spent making and sharing these No-Bake Pumpkin Shaped Oreo Balls! Whether you’re creating them for a festive gathering or just treating yourself, these little bites of joy are sure to warm your heart and bring a smile to your face. Happy cooking, friends, and may your fall be filled with flavors and memories that last a lifetime!
PrintNo-Bake Pumpkin Shaped Oreo Balls

Delightful no-bake pumpkin-shaped Oreo balls that are perfect for fall festivities.
- Prep Time: 15 minutes
- Cook Time: 0 minutes
- Total Time: 45 minutes
- Yield: 20 servings 1x
- Category: Dessert
- Method: No-Cook
- Cuisine: American
- Diet: Vegetarian
Ingredients
- 1 package of Oreo cookies
- 8 oz cream cheese, softened
- Orange candy melts
- Mini chocolate chips (for eyes)
- Green candy melts (for stems)
Instructions
- Crush the Oreos: Place the entire package of Oreo cookies in a food processor and pulse until they are a fine crumb.
- Mix in the Cream Cheese: In a large bowl, combine the Oreo crumbs with 8 oz of softened cream cheese.
- Form the Balls: Grab about a tablespoon of the mixture and roll it into a ball. Place them on a baking sheet lined with parchment paper.
- Chill the Dough: Pop the baking sheet into the refrigerator for about 30 minutes or until the balls firm up.
- Melt the Candy Coating: Melt the orange candy melts in the microwave until smooth.
- Coat the Oreo Balls: Dip each ball into the orange candy coating.
- Add the Mini Chocolate Chips: Gently press two mini chocolate chips onto each ball for eyes.
- Make the Stems: Melt green candy melts and create a small stem on top of each pumpkin ball.
- Final Chill: Place the pumpkin Oreo balls back in the refrigerator for about 15 minutes to set the candy coating completely.
- Serve and Enjoy!: Plate them up in a fall-themed dish.
Notes
Can be made a few days in advance and stored in an airtight container in the fridge.
Nutrition
- Serving Size: 1 ball
- Calories: 120
- Sugar: 9g
- Sodium: 50mg
- Fat: 7g
- Saturated Fat: 4g
- Unsaturated Fat: 3g
- Trans Fat: 0g
- Carbohydrates: 14g
- Fiber: 1g
- Protein: 1g
- Cholesterol: 20mg
Keywords: pumpkin, fall dessert, no-bake recipe, Oreo balls, Halloween treats