The Sweet Charm of Boston Cream Pie: A Recipe for Memories
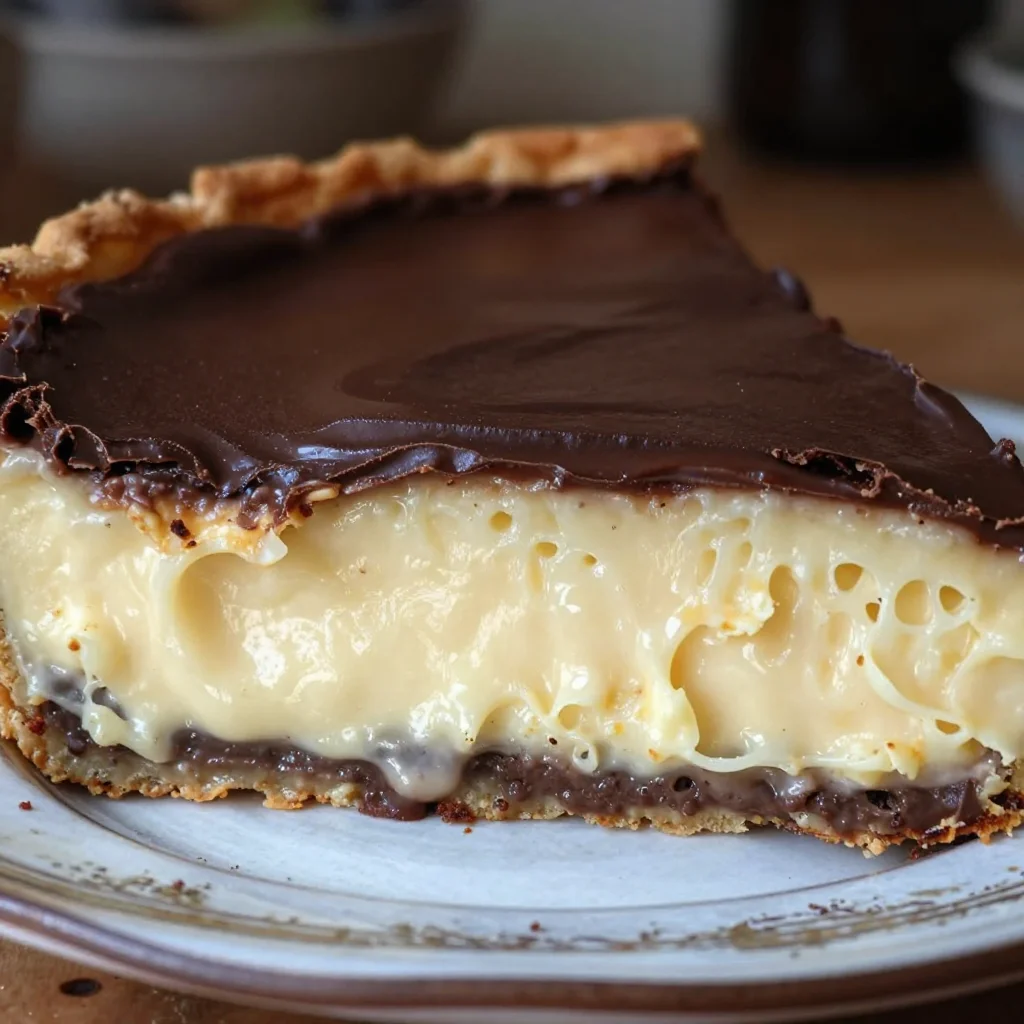
Hey there, fellow food lovers! Clara here, and today I’m excited to take you on a delicious journey into the world of Boston Cream Pie. Now, if you’ve ever had the pleasure of indulging in this delightful dessert, you’ll know it’s not actually a pie at all! Instead, it’s a dreamy combination of layers made from light sponge cake, rich pastry cream, and topped with a luscious chocolate glaze. It’s a classic dessert that perfectly straddles the line between cake and pie, and it’s all wrapped up in a nostalgic backstory that warms my heart.
Boston Cream Pie has its roots in the culinary scene of the late 19th century and was created in—surprise, surprise—Boston! This dessert is often hailed as the official dessert of Massachusetts, but it’s so much more than just a state icon; it’s a symbol of home-cooked warmth and shared moments. I still remember the first time I made this treat. While flipping through my grandmother’s old recipe book, I stumbled upon her handwritten notes for “something special for birthdays.” The recipe, stained with time and love, called out to me, begging to be recreated.
There was something magical about her method—each step felt like a dance of flavors and memories, and I was determined to do her proud. With flour dust flying everywhere and the scent of vanilla wafting through the air, I found myself transported to her cozy kitchen filled with laughter and the sweet sound of family gathering around the table. So, whether you’re planning a birthday celebration, an intimate dinner, or just a Wednesday Treat Yo’ Self moment, Boston Cream Pie is here to make it special.
Are you ready? Let’s dive into this delicious adventure together and whip up a Boston Cream Pie that will leave everyone asking for seconds—trust me, there are no judgments here!
Personal Story
As a kid, I spent countless summers at my grandmother’s house. It was a treasure trove of warmth, wisdom, and the kind of recipes passed down through generations. I still vividly remember my grandmother in her apron, hair in a bun, and a sparkle in her eyes as she whisked ingredients that seemed to magically turn into the most delightful desserts.
Every time we whipped up her Boston Cream Pie, it turned into a family event. We would gather around the shimmering kitchen counter, with my siblings and cousins eagerly awaiting the first taste. I’d often sneak tiny spoonfuls of the custard filling—it was heavenly! I can still feel the thrill of anticipation when that chocolate glaze poured over the top, and my grandmother would declare, “Now we must be patient!” Waiting for it to set was torture, but those moments taught me that good things come to those who wait, especially when it involves dessert.
This recipe carries a little piece of her sweet legacy. Every time I make it, I’m reminded of her laughter, delicious stories, and of course, her gentle nudge to savor every bite. So grab your apron, and let’s recreate this classic together while adding our unique touch along the way!
Ingredients
Here’s what you’ll need to whip up this luscious Boston Cream Pie:
For the Cake:
-
1 cup all-purpose flour
- This is the backbone of your cake, providing structure. You can use cake flour for a lighter texture, or even gluten-free flour if needed.
-
1 cup sugar
- Adds sweetness and moisture. You can substitute with coconut sugar for a more caramel-like flavor, or a sugar alternative if watching your sugar intake.
-
1/2 cup unsalted butter, softened
- This helps create a tender crumb. If you prefer, you can use vegetable oil or vegan butter for a dairy-free version.
-
2 large eggs
- They provide richness and help in binding. For an egg substitute, try 1/4 cup of unsweetened applesauce per egg.
-
1/2 cup milk
- Adds moisture to the cake. Almond milk or oat milk works as a fantastic dairy-free alternative.
-
2 teaspoons baking powder
- This leavening agent is essential for that fluffy texture!
-
1 teaspoon vanilla extract
- Vanilla is the secret ingredient that adds warmth. Feel free to get fancy with vanilla bean paste!
-
1/4 teaspoon salt
- A little salt enhances the sweetness of the cake.
For the Custard Filling:
-
1 cup heavy cream
- Essential for creating that fantastic whipped texture. You can substitute with coconut cream for a dairy-free option.
-
1/2 cup granulated sugar
- Sweetens the custard, but feel free to use alternative sweeteners if you prefer.
-
2 tablespoons cornstarch
- This thickens up your custard beautifully. You can use arrowroot powder as a substitute.
-
2 cups milk
- Makes the base of your custard. Again, plant-based milk is great here too!
-
1 teaspoon vanilla extract (for custard)
- More vanilla means more flavor!
For the Chocolate Glaze:
-
4 ounces bittersweet chocolate
- Rich and deep flavor—just divine. You can use semi-sweet chocolate chips as a substitute.
-
1/2 cup heavy cream
- Creates a smooth, pourable glaze. Use coconut cream if you’re making this dairy-free!
Step-by-Step Instructions
Now, let’s get to the fun part—making this delicious cake!
Step 1: Make the Cake
-
Preheat your oven to 350°F (175°C). Grease and flour two 9-inch round cake pans. This prevents any cake drama later!
-
In a mixing bowl, cream together the softened butter and sugar until light and fluffy (about 3-4 minutes). This is where magic happens, and the texture transforms.
-
Add in the eggs, one at a time, mixing well after each addition. Don’t rush this step; let those eggs work their magic!
-
Mix in the milk and vanilla extract. Combine until fully incorporated. This should smell wonderful!
-
In a separate bowl, whisk together the flour, baking powder, and salt. Slowly add this dry mixture to the wet ingredients, mixing until just combined. Pro tip: Be careful not to overmix—this can lead to a dense cake.
-
Pour the batter evenly into your prepared pans. You can tap the pans gently to eliminate any air bubbles.
-
Bake for 25-30 minutes, or until a toothpick inserted in the center comes out clean. Let them cool in the pans for about 10 minutes, then transfer to wire racks to cool completely.
Step 2: Make the Custard Filling
-
In a medium saucepan, combine the milk, sugar, and cornstarch over medium heat. Whisk continuously until it starts to thicken. This is your custard base.
-
Once thickened, remove from heat and stir in the vanilla extract. Cover with plastic wrap directly on the surface of the custard to prevent a skin from forming. Let cool.
Step 3: Whip the Heavy Cream
-
In a clean bowl, beat the heavy cream until soft peaks form. This should take about 2-4 minutes on medium-high speed. You can add a dab of vanilla extract for extra flavor.
-
Gently fold the whipped cream into the cooled custard, creating a light and airy mixture. This custard filling is now a showstopper!
Step 4: Assemble the Cake
-
Once the cakes are completely cooled, place one layer on your serving plate. Spoon the custard filling onto the first layer, spreading it out evenly.
-
Top it with the second cake layer. It’s like a delicious sandwich—yum!
Step 5: Prepare the Chocolate Glaze
-
In a small saucepan, heat the heavy cream until just beginning to simmer. Remove from heat.
-
Add the bittersweet chocolate to the hot cream, letting it sit for a minute before stirring until smooth and shiny. You can also melt chocolate in the microwave in 30-second intervals.
Step 6: Glaze the Cake
-
Pour the chocolate glaze over the top of the cake, allowing it to drip down the sides. This part is incredibly satisfying and oh-so-fancy!
-
Refrigerate the cake for about 30 minutes to set the glaze (if you can wait!).
Serving Suggestions
When it comes to serving your beautiful Boston Cream Pie, presentation is key! Slice into those lovely layers, showcasing the creamy custard and chocolate glaze. You can add a touch of elegance by garnishing with whipped cream on each slice or maybe even a sprinkle of cocoa powder. Serve it with a cup of freshly brewed coffee or a scoop of vanilla ice cream for a delightful experience that will have everyone swooning.
Recipe Variations
Feeling adventurous? Here are some fun twists and variations to try:
- Fruit-Filled: Add fresh berries between the layers for a fruity burst!
- Nutty Delight: Stir in some chopped nuts, like pistachios or pecans, into the custard or sprinkle on top for an added crunch.
- Lemon Zest: Mix in lemon zest into the custard for a zesty twist—bright and refreshing!
- Coconut Cream: Substituting the vanilla for coconut extract gives it a tropical feel.
Chef’s Notes
As I’ve made this cake over the years, I’ve enjoyed experimenting with various flavors and techniques. One of my favorite discoveries was adding almond extract to the cake batter, which gives it a delightful depth that has everyone asking for the secret ingredient! Plus, don’t be discouraged if things get a bit messy in the kitchen—it simply adds character to the cooking experience! Just remember that cooking is about joy, sharing moments, and creating something delicious from the heart.
FAQs and Troubleshooting
Q: Why is my cake dense?
A: Make sure not to overmix your batter after adding flour! This can develop gluten and lead to a dense cake.
Q: Can I make this ahead of time?
A: Absolutely! You can prepare the cake layers and custard a day in advance. Just glaze it before serving for the best presentation.
Q: How do I fix a runny custard?
A: If your custard turns out too runny, you can cook it over low heat while whisking until it’s thickened. The cornstarch needs time and heat to activate.
Q: Can I freeze this cake?
A: Yes! Just wrap the cake tightly in plastic wrap and foil before freezing. When ready to serve, let it thaw in the fridge overnight, then glaze before serving for that fresh taste.
Nutritional Info
While I don’t have the exact nutritional breakdown handy, I always recommend enjoying this treat in moderation—as desserts should be a delightful indulgence, not a source of guilt!
There you go! Now you have your complete guide to creating a stunning Boston Cream Pie that’s bound to bring joy not only to your tastebuds but also to all who gather around the table. So let’s get cooking, and before you know it, you’ll have a delightful creation that’s steeped in flavor and cherished memories. Happy baking, friends! 🍰❤️
PrintBoston Cream Pie
A delightful dessert combining layers of sponge cake, rich pastry cream, and a luscious chocolate glaze, perfect for any celebration.
- Prep Time: 15 minutes
- Cook Time: 30 minutes
- Total Time: 45 minutes
- Yield: 8 servings 1x
- Category: Dessert
- Method: Baking
- Cuisine: American
- Diet: Vegetarian
Ingredients
- 1 cup all-purpose flour
- 1 cup sugar
- 1/2 cup unsalted butter, softened
- 2 large eggs
- 1/2 cup milk
- 2 teaspoons baking powder
- 1 teaspoon vanilla extract
- 1/4 teaspoon salt
- 1 cup heavy cream
- 1/2 cup granulated sugar
- 2 tablespoons cornstarch
- 2 cups milk (for custard)
- 1 teaspoon vanilla extract (for custard)
- 4 ounces bittersweet chocolate
- 1/2 cup heavy cream (for glaze)
Instructions
- Preheat your oven to 350°F (175°C). Grease and flour two 9-inch round cake pans.
- Cream together the softened butter and sugar until light and fluffy (about 3-4 minutes).
- Add in the eggs, one at a time, mixing well after each addition.
- Mix in the milk and vanilla extract until fully incorporated.
- Whisk together the flour, baking powder, and salt in a separate bowl. Slowly add this dry mixture to the wet ingredients, mixing until just combined.
- Pour the batter evenly into the prepared pans. Bake for 25-30 minutes, or until a toothpick inserted in the center comes out clean. Let cool for 10 minutes before transferring to wire racks.
- Combine the milk, sugar, and cornstarch in a medium saucepan over medium heat. Whisk continuously until it thickens.
- Stir in the vanilla extract. Cover with plastic wrap and let cool.
- Beat the heavy cream in a clean bowl until soft peaks form.
- Fold the whipped cream into the cooled custard carefully.
- Place one cake layer on your serving plate and spoon the custard filling onto the first layer.
- Top with the second cake layer.
- Heat the heavy cream in a small saucepan until simmering. Remove from heat.
- Add the bittersweet chocolate to the hot cream, letting it sit before stirring until smooth.
- Pour the chocolate glaze over the top of the cake and refrigerate for 30 minutes to set the glaze.
Notes
Serve with whipped cream or a sprinkle of cocoa powder for an elegant presentation.
Nutrition
- Serving Size: 1 slice
- Calories: 350
- Sugar: 25g
- Sodium: 150mg
- Fat: 19g
- Saturated Fat: 10g
- Unsaturated Fat: 8g
- Trans Fat: 0g
- Carbohydrates: 41g
- Fiber: 1g
- Protein: 6g
- Cholesterol: 70mg
Keywords: Boston Cream Pie, dessert recipe, cake recipe, chocolate glaze, custard dessert