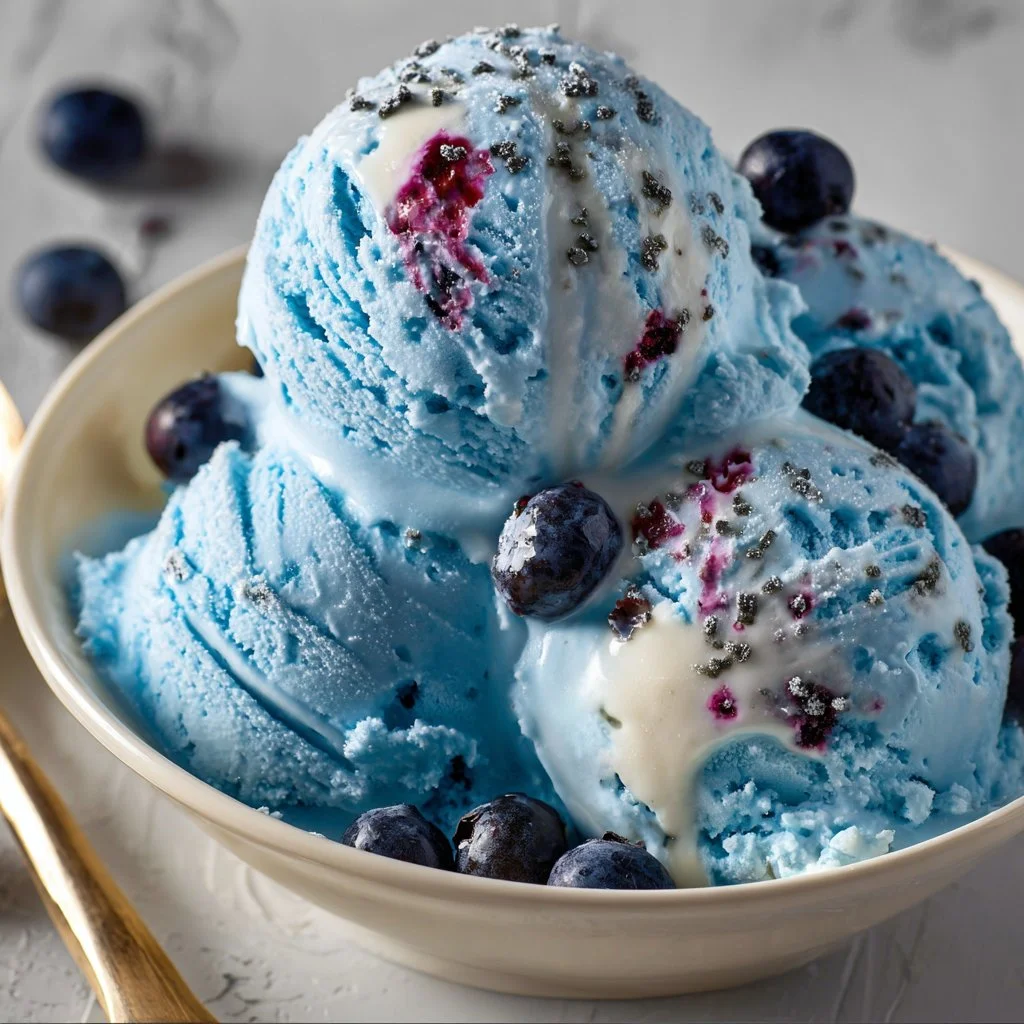
Homemade Blue Moon Ice Cream: Cool and Creamy Delight
Hey there, fellow ice cream lovers! Today, I’m thrilled to share one of my absolute favorite recipes that will take you back to sun-soaked days and warm evenings with friends: Blue Moon Ice Cream. If you’ve ever strolled past an ice cream parlor and been intrigued by that vibrant, sky-blue scoop, you’re in for a treat!
This sweet, creamy concoction is like biting into summer itself, bursting with bold, fruity flavors that dance on your taste buds. Not only does it bring a splash of color to your dessert table, but it also embodies that playful spirit of childhood—a time when our biggest worry was getting our hands sticky from melting ice cream on a hot day. So, let’s unlock the secret to making this whimsical treat, shall we?
Blue Moon Ice Cream is not only a showstopper but also incredibly easy to make at home. You don’t need fancy equipment or chef training; just a love for good food and a desire to create something special. Whether you’re planning a backyard barbecue, a movie night, or simply craving something cool, this recipe is perfect for making unforgettable moments with the people you love.
So grab your mixing bowl and a spoon, and get ready to create this creamy masterpiece! Let’s dive into the deliciousness of Blue Moon Ice Cream, exploring not just how to make it, but why it’s an experience worth relishing.
Personal Story
Whenever I think of Blue Moon Ice Cream, I’m instantly transported to the little parlor down the street from my childhood home. Every Friday, my family would have a tradition: after a long week, we’d all pile into the car and make our way to that charming little spot. As a kid, my eyes would light up when I saw the colorful flavors, but nothing drew me in quite like that bright blue ice cream.
I remember the way it felt to cradle that waffle cone in my hand, the bliss of feeling that sweet, cool ice cream against the summer heat. I’d savor each scoop, trying to identify the secret flavors swirling within. Was it lemon? A touch of raspberry? Whatever it was, it felt like magic.
The Saturday mornings spent waiting eagerly for the parlor to open, the laughter with my family as we tried to decide on the perfect flavor—it all holds a special place in my heart. And now, I get to recreate that joy in my own kitchen, crafting Blue Moon Ice Cream that not only brings nostalgia but also fills my space with laughter and love. It’s not just a recipe; it’s a memory, and I can’t wait for you to create your own!
Ingredients
Here’s what you’ll need:
-
1 cup whole milk
This creamy base helps create a luscious texture. If you’re looking for a lighter option, you can swap it with almond milk, but the creaminess may vary. -
1 ½ cups heavy whipping cream
The heaviness adds that rich creaminess that makes ice cream luscious. If you want a less rich version, you can use half-and-half, but it might lose some fluffiness. -
½ cup sugar
Sweetness is key! Use granulated sugar, or for a healthy twist, consider using honey or agave syrup—just adjust the quantity slightly as they are sweeter. -
3 teaspoons vanilla pudding mix
This is the secret to our ice cream’s fantastic texture! It adds creaminess and stabilizes the mixture. If you prefer, a cornstarch slurry can work as a substitute. -
1 teaspoon vanilla extract
For that classic creamy flavor, this is a must! A dash of almond extract could also add an interesting twist—just don’t go overboard. -
1 teaspoon raspberry extract or 1 cup raspberries
This brings out fruity notes that perfectly complement the other flavors. If raspberry isn’t your thing, you might try strawberry or a swirl of cherry for a zing! -
1 teaspoon lemon extract
Just a hint of tartness balances the sweetness beautifully. If you don’t have lemon extract, a squeeze of fresh lemon juice will do the trick! -
¼ teaspoon salt
A pinch of salt amplifies the flavors, enhancing the overall taste. Make sure to keep it light; we don’t want salt to overpower! -
½ teaspoon blue food coloring
This is what makes our ice cream eye-catching! Feel free to adjust the amount for more vibrancy or use natural alternatives like spirulina for color.
Step-by-Step Instructions
Alright, let’s make some magic in the kitchen! Follow along with these steps to whip up your very own Blue Moon Ice Cream.
-
Mix the Cream Base:
In a large mixing bowl, combine the whole milk, heavy whipping cream, and sugar. Whisk them together until the sugar dissolves completely—this will only take a minute or two. This creamy mixture serves as the base for our ice cream, so make sure it’s smooth and combined! -
Add the Magic Ingredients:
Now, it’s time for the fun part! Stir in the vanilla pudding mix, vanilla extract, raspberry extract (or raspberries), lemon extract, and salt. Mix until everything is well combined. This is your chance to get creative! If you’re using strawberries instead of raspberries, this is the moment to get those flavors in. -
Color it Up:
Carefully add the blue food coloring. Start with half a teaspoon, then mix well and check the color. Add more if you’d like it to be even bluer—have fun with it! If you’re using a natural colorant like spirulina, start with just a small pinch. -
Chill the Mixture:
Cover your bowl with plastic wrap and let it chill in the refrigerator for at least 2 hours. Chilling the mixture allows the flavors to meld beautifully, ensuring each scoop is bursting with deliciousness. -
Churn Away:
After your base has chilled, transfer it to your ice cream maker and churn according to the manufacturer’s instructions. Typically, this process takes about 20-25 minutes. The mixture should start to thicken and take on a fluffy texture!Chef Tip: If you don’t have an ice cream maker, no problem! Pour the mixture into a shallow dish and freeze. Stir vigorously every 30 minutes for about 2-3 hours—or until creamy.
-
Freeze to Set:
Once churned, transfer your ice cream to an airtight container. Smooth the top with a spatula, press a piece of parchment paper against the surface to prevent ice crystals, and seal it. Pop it in the freezer for at least 4 hours or until it’s scoopable. -
Scoop & Enjoy:
When you’re ready to dig in, let your ice cream sit at room temperature for a couple of minutes for easier scooping. Grab your favorite cone or bowl, and dig that scoop into heaven!
Serving Suggestions
For an irresistible presentation, I like to serve my Blue Moon Ice Cream in classic waffle cones adorned with colorful sprinkles. Feel free to top it with a dollop of whipped cream and a cherry for that old-school diner feel! If you’re feeling creative, create an ice cream sundae bar with various toppings—think crushed cookies, fresh fruit, and chocolate sauce.
Let’s make it a party!
Recipe Variations
- Cookie Dough Delight: Add chunks of cookie dough to the ice cream before the last few minutes of churning.
- Chocolate Swirl: Drizzle in a fudge or chocolate sauce towards the end of churning for a rich contrast.
- Berry Burst: Mix in fresh or frozen berries right as you finish churning for a delightful fruity surprise.
- Nutty Brownie Fusion: Fold in brownie pieces and walnuts for an indulgent twist.
- Vegan Alternative: Swap the dairy with coconut or almond milk, and use vegan-friendly pudding mix to create a plant-based version!
Chef’s Notes
As with many of my recipes, this Blue Moon Ice Cream has evolved over time! I first attempted it back in college during a nostalgia-driven midnight baking spree. I remember accidentally spilling too much vanilla when trying to make it more exciting, but guess what? It turned out amazing! So now, I say go with your cravings!
Remember, the kitchen is all about exploration, so feel free to play with flavors and ingredients until you find your perfect blend. The best memories often come from unexpected kitchen moments—so don’t shy away from taking risks!
FAQs and Troubleshooting
-
Why is my ice cream too hard?
If your ice cream is as hard as a rock, try letting it sit out for around 10-15 minutes before scooping. You might also add more heavy cream next time to achieve a softer texture. -
What can I do if it’s too soft?
If your ice cream is too soft after freezing, it’s likely because it didn’t churn long enough. Make sure to churn thoroughly until the mixture thickens enough before freezing. -
How do I prevent ice crystals from forming?
To minimize ice crystals, try to keep your ice cream container tightly sealed and consider using parchment paper on the surface. Also, serve as soon as it’s ready for the best texture! -
What if I don’t have an ice cream maker?
If you’re without an ice cream maker, pour your mixture into a shallow dish and freeze as mentioned earlier. Just remember to pitstop for frequent stirring while it freezes.
Nutritional Info
Per serving (1/2 cup, approximately):
- Calories: 250
- Fat: 18g
- Carbohydrates: 22g
- Protein: 3g
(Note: Nutritional info may vary depending on specific ingredient brands and measurement changes.)
Created with love and buttercream dreams, this Blue Moon Ice Cream is a joy to prepare and even more enjoyable to share. So gather your loved ones, whip up this delightful treat, and indulge in a moment that’s sweet, creamy, and unforgettable. Happy scooping! 🍦
PrintHomemade Blue Moon Ice Cream

A sweet and creamy blue ice cream bursting with fruity flavors that brings nostalgia and joy to your dessert table.
- Prep Time: 15 minutes
- Cook Time: 30 minutes
- Total Time: 150 minutes
- Yield: 4 servings 1x
- Category: Dessert
- Method: Churning
- Cuisine: American
- Diet: Vegetarian
Ingredients
- 1 cup whole milk
- 1 ½ cups heavy whipping cream
- ½ cup sugar
- 3 teaspoons vanilla pudding mix
- 1 teaspoon vanilla extract
- 1 teaspoon raspberry extract or 1 cup raspberries
- 1 teaspoon lemon extract
- ¼ teaspoon salt
- ½ teaspoon blue food coloring
Instructions
- Mix the Cream Base: In a large mixing bowl, combine the whole milk, heavy whipping cream, and sugar. Whisk them together until the sugar dissolves completely.
- Add the Magic Ingredients: Stir in the vanilla pudding mix, vanilla extract, raspberry extract (or raspberries), lemon extract, and salt. Mix until well combined.
- Color it Up: Carefully add the blue food coloring, adjusting for desired vibrancy.
- Chill the Mixture: Cover the bowl with plastic wrap and let it chill in the refrigerator for at least 120 minutes.
- Churn Away: Transfer the chilled base to your ice cream maker and churn according to the manufacturer’s instructions, typically 20-25 minutes.
- Freeze to Set: Transfer the churned ice cream to an airtight container and freeze for at least 240 minutes.
- Scoop & Enjoy: Let your ice cream sit at room temperature for a couple of minutes before scooping it into cones or bowls.
Notes
For added fun, serve with colorful sprinkles, whipped cream, and a cherry on top. Explore variations by adding cookie dough or using different fruits.
Nutrition
- Serving Size: 1/2 cup
- Calories: 250
- Sugar: 20g
- Sodium: 100mg
- Fat: 18g
- Saturated Fat: 11g
- Unsaturated Fat: 5g
- Trans Fat: 0g
- Carbohydrates: 22g
- Fiber: 0g
- Protein: 3g
- Cholesterol: 60mg
Keywords: ice cream, dessert, blue moon ice cream, summer treat, homemade ice cream