Homemade No-Bake Granola Bars: Easy, Delicious, and Oh-So-Satisfying
Hey there, fellow food lovers! If you’re anything like me, you know that snacks can make or break your day. And what’s better than a homemade treat that’s not only delicious but also super simple to whip up? Today, we’re diving into the world of no-bake granola bars—a perfect solution for those busy mornings or midday munchies. Grab your apron, and let’s get cooking!
The Beauty of No-Bake Granola Bars
Let me take you back to a sunny Saturday morning when I was a child. My mom always took her time in the kitchen, flipping through her well-loved recipe books, the pages dog-eared and stained with splashes of culinary adventures. One day, I came across her hand-written recipe for granola bars, and I distinctly remember how my eyes lit up. The idea of creating something delicious without even turning on the oven was mind-blowing!
We gathered in the kitchen, and I watched as my mom combined the most fragrant nut butter and golden honey, thick and gooey. We mixed in hearty oats and added a sprinkle of chocolate chips—because who doesn’t love chocolate? The best part? We were allowed to lick the spoon. That’s the magic of cooking: it’s not just about the food; it’s about the love and memories crafted along the way.
Ingredients: What You Need to Make Magic Happen
For our homemade no-bake granola bars, you’ll need the following ingredients:
-
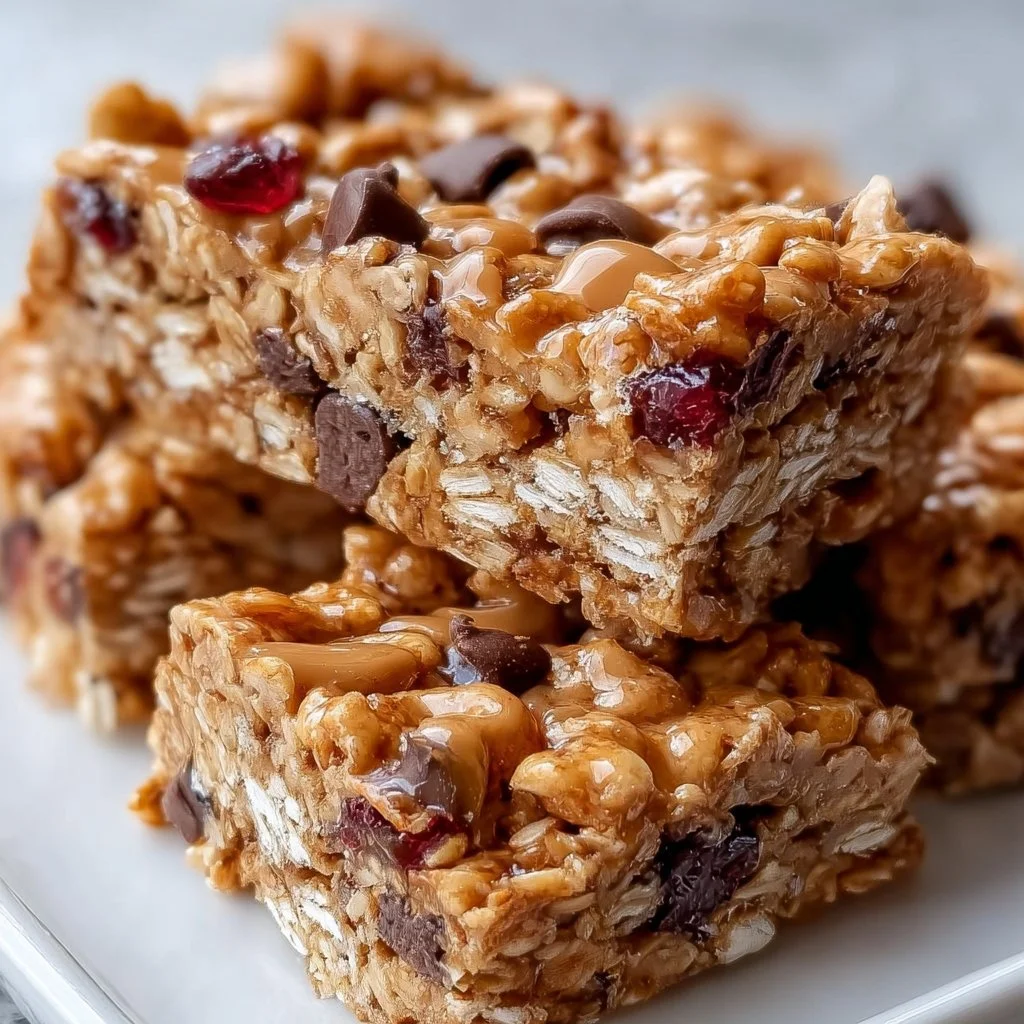
2 cups oats: The base of our bars, providing a hearty texture and fiber. Quick oats work great here, but feel free to use rolled oats if that’s what you have on hand. Just note that they might need a tad more binding.
-
1 cup nut butter: Almond butter, peanut butter, or even sun butter—pick your favorite! Nut butter is the ultimate glue that holds everything together. Pro tip: If you’re using natural nut butter, give it a good stir before measuring, as the oil tends to separate.
-
1/2 cup honey or maple syrup: These natural sweeteners add flavor and help bind our bars. Maple syrup is a fantastic vegan alternative to honey. If you prefer less sweetness, you can adjust this amount.
-
1/2 cup chocolate chips (optional): Because life is too short not to have a little chocolate in it! Dark, milk, or even white chocolate chips all work well. If you want a healthier option, try using cacao nibs for a hint of chocolate without the sugar.
-
1/2 cup dried fruits (optional): Think raisins, cranberries, or apricots—fruit adds chewiness and natural sweetness. If you’re aiming for fluffier bars, you can also use fresh fruit, but keep in mind they won’t last as long.
-
1/2 cup seeds (optional): Flaxseeds, pumpkin seeds, or sunflower seeds add crunch and a boost of nutrition. You can swap these with nuts if you prefer a nutty flavor instead!
Step-by-Step Instructions: Let’s Get Cooking!
-
Gather Your Ingredients: Place all ingredients on your kitchen countertop, ensuring everything is easily accessible. This makes the whole process seamless and fun!
-
Mix the Base: In a large mixing bowl, combine the oats, nut butter, and honey or maple syrup. Use a spatula to mix until everything is well-combined and sticky. You want a uniform mixture, so don’t hold back on the elbow grease here!
-
Add Flavor: If you’re going for it, now is the time to fold in those chocolate chips, dried fruits, and seeds. Mix them in with love! Make sure they’re evenly distributed—every bite should be a burst of flavor.
-
Shape the Bars: Line a square baking dish with parchment paper, leaving a bit of overhang for easy removal later. Transfer your mixture into the dish and press it down firmly. You can use a spatula or your hands (lightly wet them to prevent sticking!). The firmer you pack it, the better your bars will hold together.
-
Chill Time: Place the dish in the refrigerator for at least 1-2 hours. This step is crucial for the bars to set properly. The chill will help them firm up so they won’t crumble at the first bite!
-
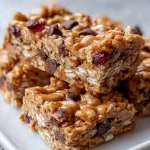
Slice and Enjoy: After the chilling time, remove the slab from the dish using the parchment paper overhang. Slice it into bars or squares, and they’re ready to go! Store leftovers in an airtight container in the fridge—if they last that long!
Serving Suggestions: Plate it Up!
Serving these granola bars is as easy as enjoying them on-the-go! You can wrap each bar in parchment paper and tie them with twine for a pretty presentation—a perfect snack for kids (or adults). Pair them with a glass of almond milk or coffee for a great breakfast or snack option. You can even crumble them on top of yogurt for a delightful parfait!
Recipe Variations: Get Creative!
Now that you’ve mastered the basic recipe, it’s time to get creative! Here are a few twists you can try:
-
Trail Mix Bars: Swap in your favorite trail mix nuts and seeds for a crunchy bar bursting with flavor and texture.
-
Tropical Paradise: Add dried pineapple, coconut flakes, and macadamia nuts for an island-inspired treat.
-
Spiced Pumpkin: Mix in pumpkin puree and pumpkin spice for a fall-inspired version. Just reduce the nut butter slightly to keep the consistency right.
-
Nut-Free Goodness: Use sunflower butter instead of nut butter and check your dried fruit for nut-free options—perfect for those with allergies.
-
Protein Punch: Add your favorite protein powder to the mix for an extra nutritional boost.
Chef’s Notes: Facts from the Kitchen
Now, here’s a little behind-the-scenes scoop: This recipe has come a long way for me. Over the years, I’ve tried countless variations and ingredients. I’ve learned that the secret to the perfect no-bake granola bars is balancing the wet and dry ingredients. Too much nut butter, and they’ll be greasy; too much syrup, and they turn into a mushy mess.
A funny kitchen story I can’t forget happened one day when I got a bit distracted while mixing the ingredients. I accidentally added salt instead of cinnamon! Let’s just say my friends never let me live that down, but hey, it makes for a great story and a very salty granola bar!
FAQs and Troubleshooting: Common Questions
1. My granola bars are crumbling! What happened?
This usually means they didn’t hold together enough while pressing them into the dish. Make sure you pack them down tightly and consider adding a bit more nut butter or sweetener next time.
2. Can I freeze these bars?
Absolutely! These bars freeze wonderfully. Just wrap them individually in wax paper and store them in a freezer-safe bag. They’ll last about three months!
3. What can I use if I don’t have oats?
If you’re out of oats, you can substitute with crushed cereal or puffed rice. Just remember, it will change the texture slightly, but still delicious!
4. How do I make them gluten-free?
Use certified gluten-free oats and double-check that your nut butter and any additives, like chocolate chips, are also gluten-free.
Nutritional Info (Optional)
If you’re watching your nutritional intake, here’s a quick breakdown per bar (assuming 12 bars per batch):
- Calories: ~200
- Protein: ~6g
- Fat: ~10g
- Carbohydrates: ~22g
- Fiber: ~3g
Feel free to adjust the ingredients to suit your dietary needs!
And there you have it—homemade no-bake granola bars that are sure to satisfy your cravings and even bring a touch of nostalgia to your kitchen. I hope you feel inspired to gather your loved ones around as you mix, pour, and snack your way through this recipe. Until next time, happy cooking from my kitchen to yours!
PrintHomemade No-Bake Granola Bars
Easy and delicious no-bake granola bars that are perfect for busy mornings or midday snacks.
- Prep Time: 10 minutes
- Cook Time: 0 minutes
- Total Time: 120 minutes
- Yield: 12 servings 1x
- Category: Snack
- Method: No-Baking
- Cuisine: American
- Diet: Vegetarian
Ingredients
- 2 cups quick oats
- 1 cup nut butter (almond, peanut, or sun butter)
- 1/2 cup honey or maple syrup
- 1/2 cup chocolate chips (optional)
- 1/2 cup dried fruits (optional)
- 1/2 cup seeds (optional, like flaxseeds, pumpkin, or sunflower seeds)
Instructions
- Gather Your Ingredients: Place all ingredients on your kitchen countertop, ensuring everything is easily accessible.
- Mix the Base: In a large mixing bowl, combine the oats, nut butter, and honey or maple syrup. Mix until well-combined and sticky.
- Add Flavor: Fold in chocolate chips, dried fruits, and seeds, ensuring they are evenly distributed.
- Shape the Bars: Line a square baking dish with parchment paper and transfer the mixture, pressing it down firmly.
- Chill Time: Refrigerate the dish for at least 1-2 hours to allow the bars to set properly.
- Slice and Enjoy: Remove the slab from the dish and slice into bars or squares. Store in an airtight container in the fridge.
Notes
If the bars crumble, pack them down more tightly next time. They can also be wrapped and frozen for future snacks.
Nutrition
- Serving Size: 1 bar
- Calories: 200
- Sugar: 10g
- Sodium: 50mg
- Fat: 10g
- Saturated Fat: 2g
- Unsaturated Fat: 8g
- Trans Fat: 0g
- Carbohydrates: 22g
- Fiber: 3g
- Protein: 6g
- Cholesterol: 0mg
Keywords: granola bars, no-bake, snack, healthy, easy recipe