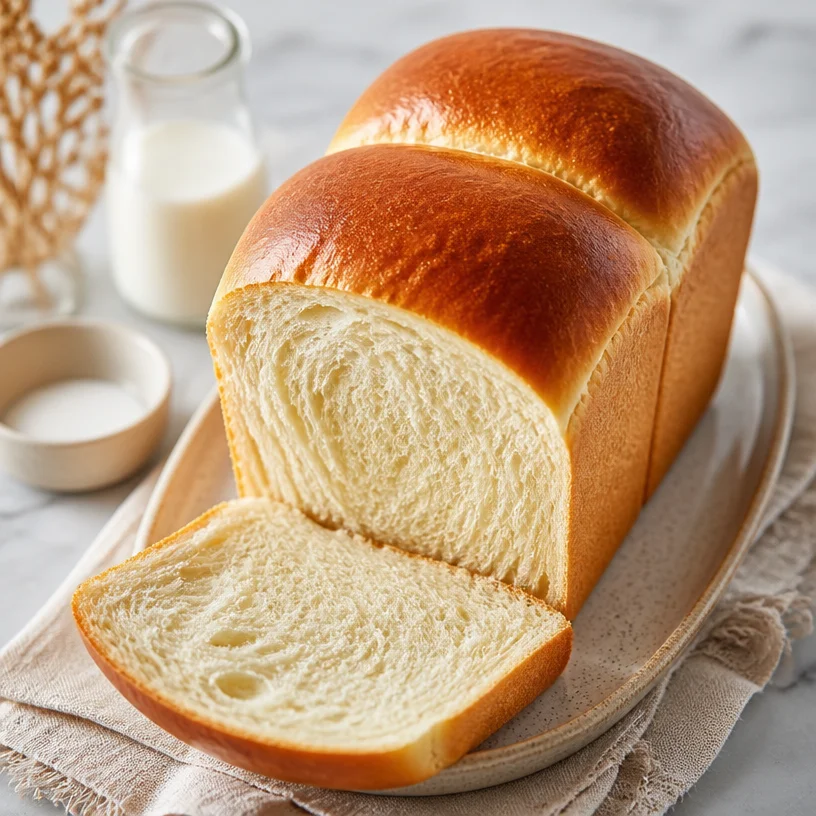
The Joy of Homemade Milk Bread: A Journey of Flavor and Warmth
Hello, fellow food lovers! Clara here from Flavors by Clara, and today we’re diving into the delightful world of homemade milk bread—a soft, fluffy loaf that’s ready to steal hearts and transform your kitchen into a warm, cozy haven. If you’ve ever taken a bite of fresh bread, you know how it has the power to comfort, evoke memories, and bring people together around the dinner table. There’s something magical about the aroma of bread baking, the way it fills your home with warmth and invites everyone in for a slice (or three).
Milk bread, in particular, is my favorite bread-making adventure. It’s enriched with milk and butter, which creates that lovely, soft texture and slightly sweet flavor that makes it perfect for any occasion—be it a casual breakfast spread with jam or a fancy dinner served alongside soup. Plus, the technique of making milk bread opens up a world of creativity, turning simple ingredients into a fluffy, pillowy delight.
Join me as we explore the wonderful art of making milk bread from scratch. I promise you’ll find it approachable, fun, and satisfying! So roll up those sleeves and let’s get started on this tasty journey that’s sure to become a staple in your kitchen.
A Slice of Nostalgia: My First Encounter with Milk Bread
Let me take you back to my childhood, where the kitchen was the heart of our home. I remember sitting at the table, doodling while my mom baked. The warm scent of fresh bread wafting through the air was the best sort of invitation, drawing me in like a moth to a flame. My favorite was the special milk bread she made on rainy weekends. It was magical to watch her knead the dough, transforming it from a sticky blob into something soft and smooth.
When that loaf came out of the oven—golden brown and steaming—I was practically buzzing with excitement. I cannot tell you how many slices I devoured smeared with butter. It was a simple pleasure that intertwined effortlessly with lazy Saturday afternoons and the sound of rain pattering against our windows. Those moments have stuck with me, and I strive to recreate that joy every time I make milk bread. There’s just something about the process that warms my heart—and I know it will warm yours too.
Ingredients You’ll Need for Milk Bread
A good milk bread doesn’t need a long list of ingredients, just a few key things that work beautifully together:
- Milk: Whole milk is preferred for creaminess, but you can substitute with low-fat or dairy alternatives like almond or oat milk for a lighter version.
- Tangzhong: This is a simple mixture of equal parts flour and water, cooked to form a roux. It’s the secret to an incredibly soft, moist bread that stays fresh longer.
- Bread Flour: Bread flour has a higher protein content than all-purpose flour, giving your bread structure and chewiness. Don’t fret if you don’t have it—can use all-purpose flour in a pinch, but your loaf might be a touch less chewy.
Ingredient Insights:
- Milk: Using whole milk not only enriches the bread but adds a subtle sweetness. If you go dairy-free, consider unsweetened almond milk for a nice flavor.
- Tangzhong: This technique may seem odd, but trust me. It hydrates your flour better and brings out a glorious texture! You can store extra tangzhong in the fridge for up to 3 days.
- Bread Flour: If you’re curious about gluten-free baking, try a good-quality gluten-free flour blend (just ensure it contains stabilizers for the best results).
Step-by-Step Instructions to Make Your Milk Bread
Ready to dive into the magic of bread-making? Here’s your easy-peasy guide to making the perfect milk bread at home!
Step 1: Prepare the Tangzhong
-
Mix and Heat: In a small saucepan, combine 2 tablespoons of bread flour with 1/2 cup of milk (or water). Stir well until smooth. Heat over medium heat, whisking constantly. Cook until it thickens and turns into a gel-like paste, which usually takes about 2-3 minutes. Don’t rush this step; it’s crucial for your bread’s texture.
-
Cool Down: Once thickened, remove from heat and let it cool to room temperature. You can transfer it to a bowl to expedite the process.
Step 2: Combine Dry Ingredients
- In a Mixing Bowl: In a large mixing bowl, combine 3 cups of bread flour, 1 tablespoon of sugar, and 1 teaspoon of salt. Ideally, whisk this together to ensure even distribution. Salt balances flavor, and sugar helps with browning and gives a slight sweetness.
Step 3: Mix Your Dough
-
Add the Tangzhong and Wet Ingredients: Once your tangzhong has cooled, add it to the dry ingredients along with 1/2 cup of warm milk and 1/4 cup of softened unsalted butter. Mix until a shaggy dough forms.
-
Kneading Time: Transfer the dough to a floured surface and get kneading! This is where you work in love. Knead for about 10 minutes, or until the dough is smooth and elastic. A little tip: if the dough is too sticky, sprinkle just a touch more flour as needed, but don’t overdo it—too much flour will make the bread dense.
Step 4: First Rise
- Let It Rest: Place the kneaded dough into a greased bowl, cover with a clean cloth, and let it rise in a warm, draft-free spot for about 1 hour, or until doubled in size. Pro tip: If you’re short on time, your oven can be a great proofing spot. Just turn it on for a minute or two, then turn it off and place your covered bowl inside!
Step 5: Shape Your Loaf
-
Deflate and Shape: After the dough has risen, gently punch it down to deflate it. Transfer it to a floured surface, shape it into a rectangle, and fold in the sides to form a loaf shape. Pinch the seams to seal.
-
Second Rise: Place the shaped dough in a lightly greased loaf pan, cover, and let rise for another 30-45 minutes. You can gently brush the top with milk or egg wash to give it a lovely golden crust.
Step 6: Bake
-
Preheat Your Oven: Before the second rise is done, preheat your oven to 350°F (175°C). Bake the loaf for about 25-30 minutes, or until golden brown and the bottom sounds hollow when tapped.
-
Cooling: Once baked, let it cool in the pan for 10 minutes, then turn it out onto a wire rack to cool completely before slicing. Again, resist the urge to slice it while it’s still warm—trust me, a slightly cooled loaf will slice much more neatly!
How to Serve Your Milk Bread
Now that you’ve created this marvelous loaf, the big question is: how do you serve it?
- For Breakfast: Serve warm slices smeared with butter or jam (homemade berry jam is always a winner!). It also makes fantastic French toast!
- With Soup: This bread pairs beautifully with a comforting bowl of tomato soup or creamy chowder—just tear it into pieces and dunk away.
- As Sandwiches: Make scrumptious sandwiches packed with your favorite fillings—whether it’s classic PB&J or a gourmet grilled cheese.
Creative Recipe Variations
Feeling adventurous? Here are some fun twists on the classic milk bread recipe:
- Herbed Milk Bread: Mix in dried herbs like rosemary or thyme for a fragrant twist—perfect for pairing with pasta dishes.
- Sweet Cardamom Milk Bread: Add a tablespoon or two of ground cardamom to the dough for a hint of warmth and spice.
- Chocolate Chip Milk Bread: Fold in mini chocolate chips during the second rise for a delightful dessert bread that’s perfect for breakfast!
Chef’s Notes
Bread-making is an art that has brought me countless laughs and memories over the years. I have had my fair share of misadventures (like the time I mistook salt for sugar and ended up with a full loaf of salty disaster!). But from those moments, I’ve learned that it’s all about experimentation. Each loaf is a new opportunity to try something different, and it’s what keeps my passion for baking alive. Over the years, this milk bread recipe has been tweaked and perfected, and I can confidently say it’s one of my favorites now!
FAQs and Troubleshooting
Q: My bread didn’t rise well. What did I do wrong?
A: If your dough didn’t rise, it could be due to expired yeast, or maybe the temperature wasn’t warm enough for proofing. Ensure your yeast is fresh and find a cozy spot in your kitchen for it to bloom.
Q: How do I store the milk bread?
A: Keep it in an airtight container at room temperature for up to 3 days. You can also slice and freeze it for longer storage—just toast it up when you’re ready to enjoy!
Q: Can I make this recipe ahead of time?
A: Absolutely! You can prep and shape the dough the night before and put it in the fridge for a slow rise. It’ll develop more flavor while you sleep.
Q: What if my dough is too sticky?
A: A little stickiness is normal, but if it’s excessively tacky, sprinkle a little more flour during the kneading process. Just be careful not to add too much, or you could end up with dense bread.
Nutritional Info (Optional)
While I won’t delve deeply into the nitty-gritty of calories—all that matters is the joy of making and enjoying good food!—it’s worth noting that this delightful bread is a nice source of carbs and offers a richness thanks to the milk and butter.
There you have it, my friends, the marvelous journey of making fluffy, homemade milk bread! I hope this recipe brings you as much joy in your kitchen as it has in mine. So what are you waiting for? Grab those ingredients and get started; I can’t wait to hear your own baking stories! Happy cooking!
PrintHomemade Milk Bread
A soft, fluffy loaf of homemade milk bread enriched with milk and butter, perfect for any occasion.
- Prep Time: 15 minutes
- Cook Time: 30 minutes
- Total Time: 45 minutes
- Yield: 1 loaf 1x
- Category: Breads
- Method: Baking
- Cuisine: Global
- Diet: Vegetarian
Ingredients
- 2 tablespoons bread flour
- 1/2 cup whole milk (or water)
- 3 cups bread flour
- 1 tablespoon sugar
- 1 teaspoon salt
- 1/2 cup warm milk
- 1/4 cup softened unsalted butter
Instructions
- Mix and heat the tangzhong in a small saucepan until gel-like.
- Combine dry ingredients in a large mixing bowl.
- Add the tangzhong and wet ingredients to the dry ingredients; mix until shaggy dough forms.
- Knead the dough on a floured surface for about 10 minutes.
- Let the kneaded dough rise in a greased bowl for about 1 hour.
- Deflate the dough, shape it, and prepare for the second rise.
- Preheat the oven to 350°F (175°C) before the second rise is done.
- Bake for 25-30 minutes until golden brown.
- Cool in the pan for 10 minutes before slicing.
Notes
If you prefer a lighter version, substitute whole milk with almond or oat milk. For additional flavor, you can mix in herbs or spices.
Nutrition
- Serving Size: 1 slice
- Calories: 200
- Sugar: 2g
- Sodium: 200mg
- Fat: 8g
- Saturated Fat: 4g
- Unsaturated Fat: 4g
- Trans Fat: 0g
- Carbohydrates: 30g
- Fiber: 1g
- Protein: 5g
- Cholesterol: 15mg
Keywords: milk bread, homemade bread, baking