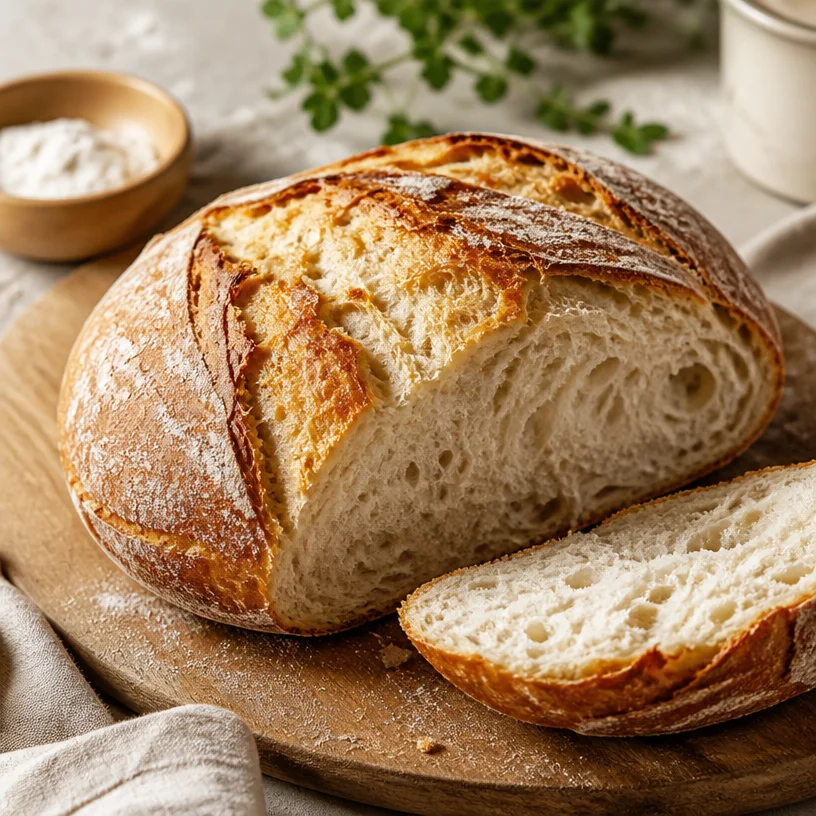
Rustic Country Bread: Embrace the Art of Bread Making
Ah, there’s nothing quite like the smell of fresh bread wafting through the kitchen. It’s a scent that instantly transports you to cozy country cottages and bustling bakeries, where loaf after loaf emerges, golden and crusty, ready to be devoured. Today, I’m about to share with you my all-time favorite Rustic Country Bread recipe—one that’s as simple as it is satisfying. Trust me, once you master this humble loaf, you’ll want to bake it every week (perhaps even every day!).
But here’s the best part: making your own bread from scratch is not just about the end result. The journey is just as delightful! With only three main ingredients—bread flour, yeast, and salt—you’re on your way to creating a hearty loaf that will impress even the pickiest of eaters. This Rustic Country Bread is perfect for slathering with butter, pairing with soup, or turning into an incredible sandwich. So, let’s roll up our sleeves and dive into the delicious world of homemade bread!
A Slice of Memory
I still remember the first time I got my hands into a bowl of flour and water, mixing them together like a true artisan baker. I was just a little girl, standing on a stool to reach the counter, my grandmother by my side. She had an effortless way of blending ingredients, letting her intuition guide her as she crafted the most fabulous bread. We didn’t have fancy equipment, just our hands and a few simple tools.
While flour clouds swirled around the kitchen, she would laugh, saying, “The mess is part of the magic, Clara!” And oh, how right she was! Kneading the dough became a joyful dance, rhythmically pushing and folding until it was smooth and elastic. I can still hear her gently reminding me, “You don’t want it too sticky, sweetheart.” The anticipation grew as we waited for it to rise. Now, as I stand in my own kitchen, I often think about those sunset-filled evenings, the glow of the oven light illuminating our shared joy. Today, in honor of those beautiful moments, I’m excited to share this Rustic Country Bread recipe with all of you.
Ingredients
Here’s what you’ll need for your Rustic Country Bread:
-
Bread Flour: This is your star ingredient! Bread flour has a higher protein content than all-purpose flour, giving the bread its structure and delightful chew. If you only have all-purpose flour on hand, you can use it, but the texture will be a bit lighter.
-
Yeast: You can use either active dry yeast or instant yeast for this recipe. Both work well, but instant yeast is my favorite. It skips a step, meaning you can mix it directly with your dry ingredients. If using active dry yeast, remember to proof it in warm water first!
-
Salt: A crucial element that enhances flavor and strengthens the dough structure. Don’t skip this! You can use sea salt or kosher salt; just avoid table salt if possible, as it can make the bread overly salty.
By using these three simple ingredients, you’ll create a beautiful canvas for customization!
Step-by-Step Instructions
Now, let’s get our hands a little messy and make some bread! Just know that every loaf is a work of art, and yours will be no different.
-
Mix the Dry Ingredients: Start by combining 4 cups of bread flour, 1.5 teaspoons of yeast, and 2 teaspoons of salt in a large bowl. Whisk them together, ensuring that the yeast and salt are evenly distributed. (Remember, we don’t want the salt to come into direct contact with the yeast before mixing; this could slow down the yeast’s action).
-
Hydrate the Dough: Gradually add 1.5 cups of warm water (about 110°F or 43°C) to the flour mixture. Stir with a wooden spoon or your hands until a shaggy dough forms. Don’t worry about mixing it too thoroughly; a few lumps are perfectly fine!
-
Knead the Dough: Turn the dough out onto a lightly floured surface. Now for the fun part—kneading! Push the dough away from you with the heel of your hand, fold it back over itself, and give it a quarter turn. Repeat this process for about 8-10 minutes until the dough is smooth and elastic. If it feels too sticky, sprinkle a little extra flour as needed, but avoid over-flouring.
-
First Rise: Place your kneaded dough in a lightly oiled bowl, cover it with a clean kitchen towel, and let it rise in a warm place for 1-2 hours, or until it doubles in size. Pro tip: An oven with the light on or a warm spot on the counter works wonders for encouraging yeast activity!
-
Shape the Dough: Once your dough has risen, punch it down gently to release any air bubbles. On a floured surface, flatten the dough and shape it into a round loaf. Don’t overwork it—just enough to form a nice shape.
-
Second Rise: Transfer your shaped dough to a floured proofing basket or bowl. Cover it with a towel and allow it to rise again for about 30-45 minutes.
-
Preheat the Oven: Preheat your oven to 450°F (232°C) during the last 15 minutes of the second rise. If you have a baking stone or Dutch oven, place that in the oven to preheat as well. This helps create a lovely crust on your bread!
-
Score the Bread: Just before baking, carefully turn your loaf onto a parchment-lined baking sheet or hot Dutch oven. Using a sharp knife or a lame, score the top of your loaf with a few shallow slashes (this allows steam to escape).
-
Bake: Place the loaf in the preheated oven and bake for 30-40 minutes, or until the bread is golden brown and sounds hollow when tapped on the bottom. If using a Dutch oven, remove the lid halfway through for extra crustiness.
-
Cool: Once baked, remove the bread from the oven and let it cool on a wire rack. This part is crucial! Allowing the bread to cool completely will ensure the interior crumb sets properly.
And there you have it: a rustic loaf that could rival any bakery’s offerings!
Serving Suggestions
The best way to enjoy your Rustic Country Bread is warm with a pat of salted butter. Or go the extra mile and whip up some flavored compound butter—think garlic and herb or honey and cinnamon! You can also slice it for the classic sandwich experience. Picture crusty slices layered with fresh turkey and cranberry sauce in the fall, or enjoy it with a warm bowl of homemade vegetable soup on a chilly night.
Recipe Variations
Feeling adventurous? Here are some fun ways to give your Rustic Country Bread a twist:
-
Herb-Infused Loaf: Add a tablespoon of your favorite dried herbs (like rosemary or thyme) to the dry mixture for a fragrant aroma. Fresh herbs work too—that rustic feel is calling!
-
Seeded Crust: Before baking, sprinkle the top of the loaf with sesame or poppy seeds for added texture and flavor.
-
Olive and Garlic: Fold in chopped olives and roasted garlic cloves into the dough before shaping for a Mediterranean flair.
-
Cheese Lover’s Delight: Mix in shredded cheese (like sharp cheddar or Parmesan) for a cheesy, rich flavor.
-
Whole Wheat Variation: Combine two cups of bread flour with two cups of whole wheat flour for added nutrition without sacrificing too much texture.
Chef’s Notes
Every time I bake this Rustic Country Bread, it feels like a little bit of my grandmother’s spirit comes alive. It’s in those moments of kneading, rising, and baking that I find joy, just like she did. Bread-making has taught me patience and creativity, reminding me that each loaf tells a story. So, don’t rush your process; enjoy each step! And remember, even if your bread doesn’t come out perfectly, it will still be tasty and loved.
FAQs and Troubleshooting
Q: My bread didn’t rise! What went wrong?
A: Several factors could be at play. Check your yeast is fresh and active—old yeast won’t give you a good rise. Additionally, make sure your water isn’t too hot, as high temperatures can kill the yeast. Lastly, remember the importance of a warm environment during rising.
Q: My crust is too hard!
A: There could be a few reasons for this. If your oven temperature is too high, it can create a tough crust. Lower it slightly and try baking for a longer period. Also, adding steam (like placing a pan filled with hot water in the oven) during the first few minutes of baking can create a tender crust.
Q: Can I make this bread without gluten?
A: This specific recipe relies on gluten for its structure, but you can substitute with a gluten-free bread blend. Just follow the blend’s specific instructions, as gluten-free dough often requires different hydration levels.
Q: How should I store my bread?
A: To maintain freshness, wrap your cooled bread in a clean kitchen towel and store it in a cool, dry place. If you won’t finish it in a few days, consider freezing slices to maintain freshness. Just toast them up directly from the freezer!
Q: Can I make the dough in advance?
A: Absolutely! You may prepare the dough, then after the first rise, gently punch it down and refrigerate it for up to 24 hours. When ready to bake, let it come to room temperature, perform the second rise, and proceed as normal!
Nutritional Info
For those conscious of nutritional value, one slice (about 1/16 of the loaf) has approximately:
- Calories: 120
- Carbohydrates: 25g
- Protein: 4g
- Fat: 0.5g
- Fiber: 1g
- Sugar: 0g
Remember, the fun of making Rustic Country Bread comes from the experience itself. Don your apron and get ready to mix up a little love in your kitchen. So to all my fellow foodies, let’s start this delicious adventure together! Happy baking!
PrintRustic Country Bread
A simple and satisfying Rustic Country Bread recipe, perfect for slathering with butter or making sandwiches.
- Prep Time: 15 minutes
- Cook Time: 30 minutes
- Total Time: 45 minutes
- Yield: 16 slices 1x
- Category: Baking
- Method: Baking
- Cuisine: American
- Diet: Vegetarian
Ingredients
- 4 cups bread flour
- 1.5 teaspoons yeast (active dry or instant)
- 2 teaspoons salt
- 1.5 cups warm water (about 110°F or 43°C)
Instructions
- Mix the dry ingredients in a large bowl.
- Hydrate the dough by adding warm water to the flour mixture.
- Knead the dough on a floured surface until smooth and elastic.
- First rise the dough in an oiled bowl covered with a towel.
- Shape the dough into a round loaf after the first rise.
- Second rise the shaped dough for 30-45 minutes.
- Preheat the oven to 450°F (232°C) during the last 15 minutes of the second rise.
- Score the top of the loaf with a knife before baking.
- Bake the bread for 30-40 minutes until golden brown.
- Cool the bread on a wire rack before slicing.
Notes
You can customize your bread by adding herbs, seeds, or cheese.
Nutrition
- Serving Size: 1 slice
- Calories: 120
- Sugar: 0g
- Sodium: 460mg
- Fat: 0.5g
- Saturated Fat: 0g
- Unsaturated Fat: 0g
- Trans Fat: 0g
- Carbohydrates: 25g
- Fiber: 1g
- Protein: 4g
- Cholesterol: 0mg
Keywords: bread, rustic bread, baking, homemade bread